When it gets dark before dinner, family evenings can feel rushed, gloomy, or strangely late. A cozy evening routine gives everyone a gentler way to shift from busy afternoons toward rest.
You don't need extra chores or an elaborate schedule, just a few familiar comforts that fit your household. Start with an easy transition indoors, then build a rhythm around meals, quiet time, and bedtime.
Key Takeaways
Give everyone a little breathing room after coming inside, especially when clothes are cold or damp and children need help settling.
Repeat a simple sequence of dinner, quiet family time, washing up, brushing teeth, and a story so children know what comes next.
Soften household lighting and choose a screen-free hour before bed, with easy activities that don't require much preparation.
Plan bedtime around morning wake-up time and age-based sleep needs, keeping schedules fairly steady while allowing for busy nights.
A Calmer Pace for Earlier Sunsets
Let fading daylight cue a gentler pace. A cozy evening routine doesn't have to decide your whole schedule. Shape it around your evening schedule, including late workdays, homework, family meals, and children of different ages.
Ease in from outdoor play and busy afternoons
Before outdoor play ends, give children a brief heads-up about coming inside. Then leave room for the practical stuff: shoes off, damp jackets hung up, and warm, dry clothes on.
Avoid stacking instructions while everyone is still getting through the door. A drink of water and a few minutes to settle can make the transition feel less hurried.
If you're arriving home after dark, use the same welcome-home steps. There's no need to squeeze outdoor time into an already crowded evening or rush straight into bedtime.
Build a calm bedtime rhythm everyone can remember
Choose a repeatable order for your night routine: dinner, quiet time, washing up, toothbrushing, and a story. A quick kitchen reset after dinner can be optional, not another required chore. Let the bedtime routine flex around sports practice or other commitments.
Say what comes next in plain language: "After we brush our teeth, we'll read together." A familiar sequence gives children fewer surprises.
Older children can handle more of the routine themselves, while younger ones may need company throughout. When siblings have different bedtimes, share the quiet activity first, then let each child follow their own bedtime steps.
Make Your Home Feel Warm, Calm, and Sleep-Friendly
A calmer evening doesn't require new decorations or a perfectly tidy house. Small changes to light and activity are easier to keep up with than a nightly room makeover.
Use softer light and put screens away before bed
As bedtime approaches, switch off unnecessary overhead lights and use a lamp where you're reading. Keep enough light for safe movement and comfortable reading.
Choose a screen-free hour as part of your night routine. The American Academy of Child and Adolescent Psychiatry's screen-time guidance for families recommends turning off screens and removing them from bedrooms 30 to 60 minutes beforehand.
Park devices outside bedrooms when possible. Put high-energy games and exciting shows earlier in the evening, and choose something quieter for the final stretch. Adults can join the screen break, too. For adults, herbal tea, such as chamomile tea or dandelion root tea, is an optional evening choice.
Choose simple activities that bring the family together
Keep a couple of easy choices ready: a favorite read-aloud book, paper and crayons, or a quiet card game. Let children choose between two options rather than opening up a long discussion.
Reading or having an easy conversation can be simple relaxation techniques. During dinner or while folding blankets, invite everyone to share something they enjoyed that day. This can offer a low-pressure mental reset, and nobody needs to produce an impressive answer.
On packed evenings, shorten the activity instead of creating another task. One familiar book can fit when a longer game won't. A few organizing hacks, like keeping supplies nearby, make it easier to wind down tomorrow with little preparation.
Adjust the Routine to Your Family's Sleep Needs
Early darkness doesn't automatically mean an earlier bedtime. Sleep needs and morning commitments are better starting points, with room to adjust as you notice how your child feels.
Work backward from wake-up time and age-based sleep needs
The American Academy of Sleep Medicine's recommended sleep ranges for children are 10 to 13 hours for ages 3 to 5, 9 to 12 hours for ages 6 to 12, and 8 to 10 hours for teens ages 13 to 18.
These totals cover 24 hours. The preschool range includes naps, so count daytime sleep when planning the night.
Start with the required morning wake-up time and work backward to plan a night routine. Allow time for the bedtime routine and falling asleep, rather than treating getting into bed as the start of sleep. Then watch for patterns in morning tiredness.
Keep the plan steady, but make room for real life
Aim for similar bedtimes and wake times throughout the week, which can make morning preparation less rushed. Children's Hospital of Philadelphia recommends keeping weekend timing within one to two hours of the school-week schedule. A homeschool mom with a different household schedule can use a daily planner to note wake times, if helpful.
If bedtime needs to change, shift it gradually over several evenings. Keep caffeine out of the afternoon and evening, including caffeinated sodas and energy drinks.
Late practices, visitors, and rough days will happen. After a disrupted evening, return to the usual order without treating it as a failure. On tired nights, keep necessary care and shorten optional activities. If sleep difficulties persist, talk with your child's pediatrician.
Frequently Asked Questions
How long should a cozy evening routine take?
It can be as short as the time your household needs for dinner, basic care, and a quiet transition to bed. On busy nights, keep the familiar order and shorten optional activities.
Should children go to bed earlier when it gets dark sooner?
Not necessarily; plan bedtime around morning wake-up time and age-based sleep needs, rather than sunset alone. Watch for patterns in how rested your child seems in the morning.
What can we do if our evening schedule changes often?
Keep a few familiar steps, such as washing up and reading, even when the timing shifts. After a late or disrupted evening, return to your usual order the next night without treating it as a failure.
What are some easy screen-free activities before bed?
Try reading together, drawing, or playing a quiet card game. Keep a couple of simple choices ready so the final part of the evening doesn't require much preparation.
Let Familiar Comforts Carry the Evening
Earlier sunsets can make evenings feel hurried, but a few repeatable steps can make the evening reset calmer. If it helps, take care of a few house chores before quiet time. A cleaning routine or robot vacuum is optional, and neither needs to happen every night.
Choose comforts that fit your household, and let household management support you instead of chasing perfect domestic efficiency. As daylight and schedules change, keep the routine flexible, so it eases pressure and leaves adults room for self care and rest.
Dinner is over, everyone is tired, and the remote sits within easy reach. If you're trying a screen-free week, start small with one repeatable evening activity, such as cooking together.
Screen-free family evening ideas can fit into the gap between clearing plates and brushing teeth. Simple no-screen activities for kids don't require a craft-store trip or an energetic parent.
Choose family activities at home that match tonight's mood, beginning with a short, repeatable routine.
Key Takeaways
Start small with a repeatable 5- to 30-minute activity that fits your family’s time and energy.
Keep simple supplies nearby and offer children a choice between a couple of activities to make evenings easier to begin.
Everyday moments—meal prep, dinner conversation, and cleanup—can become screen-free family time.
Adapt activities to children’s ages, abilities, and interests, and choose a natural stopping point before bedtime.
A short, low-pressure activity is enough; you don’t need to plan every evening or fill every minute.
Make Screen-Free Weeknights Easier to Start
Choose a Realistic Time Window
Start with a 15- to 30-minute block between dinner and bedtime. Cooking together, chatting, or clearing the table can count, too.
The American Academy of Pediatrics' family media resources can help you decide where screen-free time fits into your routine.
Keep Supplies Close at Hand
Put paper, crayons, cards, board games, a puzzle, and a favorite game in one small basket. Then you won't spend your available time hunting for supplies.
Rotate things you already own. A forgotten deck of cards can feel fresh after a few weeks away.
Let Kids Help Choose
Offer two choices: "Would you rather draw or play dominoes?" You can also take turns choosing the evening's activity.
During a screen-free week, try starting at a predictable time, perhaps after plates reach the sink. You can repeat an activity, leaving room for choice without a nightly negotiation.
Quick screen free ideas for the first 15 minutes
Move and Reset After the Day
Try a dance break, animal walks, or a short obstacle course with cushions on a clear floor. On warm evenings, it can be one of your screen-free summer activities. On slower evenings, stretch together.
Adapt movement to your space and everyone's abilities. CDC child activity guidance recommends activity throughout the day for ages 3 to 5 and at least 60 minutes daily for ages 6 to 17. A brief evening session can contribute without meeting the full target.
Play a No-Prep Guessing Game
Play “I Spy,” act out animals in charades for pretend play, or guess a safe household object by touch for sensory play. Touching and guessing gives kids a hands-on experience. Choose large objects without sharp edges or small detachable parts.
Preschoolers can choose between two answers. Older children can give trickier clues. Meanwhile, a parent folding towels nearby can lead a verbal round.
Draw or Tell a Story Together
Invent an animal with an unusual talent or design a dream treehouse. Share paper, or let everyone draw their own version.
Without supplies, build a story aloud. Each person adds one sentence, and the last speaker gives it an ending before bedtime.
Screen-Free Ideas to Try Around Dinner
Some of the easiest screen free ideas happen during jobs you'd do anyway.
Give Kids a Role in Meal Prep
Children can wash produce, stir cool ingredients, set napkins, or choose between two side dishes. These practical life tasks should match their abilities, with supervision around heat, blades, and breakable dishes.
On warm evenings, make a no-cook snack together as one of your screen-free summer activities. While you work, describe a favorite food or invent a name for tonight's meal.
Make the Dinner Table More Conversational
Ask about the funniest, best, or most surprising part of the day. Let a different person choose the question tomorrow.
Keep conversation welcoming rather than turning dinner into a school or behavior quiz. The AAP's family media planning guidance includes the dinner table among suggested screen-free zones.
Turn Cleanup Into a Shared Routine
Share household chores by giving everyone a manageable task: carry napkins, wipe a safe surface, or put away unbreakable items. Play a short cleanup song or set a timer as a stopping cue.
Focus on finishing together. Younger children don't need to compete with an older sibling's speed.
After-dinner screen-free family activities that take 15 to 30 minutes
Choose a Game That Fits Everyone's Energy
Cards, matching games, dominoes, and short board games work well when everyone wants to sit. Check the rules and likely game length before opening the box.
If competition frustrates younger children, play cooperatively. Work together to find all the matching pairs, with adults offering clues instead of keeping score.
Build or Create With Materials at Home
Build a blanket fort, stack a block tower, or make a paper airplane and aim toward a floor target. Recycled boxes can become garages or shops for pretend play.
Choose a natural stopping point, such as completing one structure or making one card. Keep forts clear of heaters, cords, and unstable furniture.
Take a Short Outdoor Break
Try screen-free summer activities like sidewalk chalk or a walk around the block. These outdoor activities invite nature exploration and active outdoor play, but consider weather, visibility, local conditions, and supervision.
Indoors, search for birds through a window or run a hallway scavenger hunt. A summer bucket list can help you collect ideas for a screen-free week. Brief active outings can add movement, but they don't necessarily meet CDC's daily activity recommendations.
Calm Screen-Free Activities Before Bed
Read Together in a Way That Suits the Evening
Choose a picture book, a short chapter, or a child's retelling of a familiar story to ease into bedtime routines. In summer, a seasonal story can be one of your screen-free summer activities. Keep books nearby so choosing doesn't swallow reading time.
Siblings can share the reading if they want. When bedtime is close, one brief book is enough.
Try a Quiet Puzzle or Tabletop Activity
Set out a small puzzle, coloring page, sticker activity, or simple building task. Quiet puzzle activities or sensory play can support fine motor skills while offering a slower transition.
Choose something easy to pause. During a screen-free week, keep a couple of quiet options ready for evenings when children need a slower transition. Save glitter, noisy toys, and sprawling construction projects for another time.
Add a Brief Family Check-In
Invite each person to share something they enjoyed and something they're looking forward to tomorrow. Gratitude can be an optional prompt.
Younger children might point to a drawing or name one person. Allow anyone to pass; this works better as relaxed conversation than a required performance.
Choose the right screen-free family activities for your evening
These screen-free family activities offer different levels of setup and movement. Use the table to plan a screen-free week, adapting choices for the season. Some work well as screen-free summer activities, including outdoor activities like nature exploration.
Activity
Time
Setup
Energy level
Suggested ages
I Spy
5 to 10 minutes
None
Low
3+
Dance break
5 to 15 minutes
Clear floor
High
2+, supervised
Drawing
10 to 20 minutes
Paper, crayons
Low
3+
Blanket fort
15 to 30 minutes
Blankets, stable supports
Medium
4+, supervised
Read-aloud
5 to 20 minutes
One book
Low
All ages
Nature exploration
10 to 20 minutes
Outdoor space
Low
3+, supervised
Treat ages as starting suggestions, then adapt activities to your child's abilities. Also, gear supervision to your own children. These are just suggestions.
Match the Activity to the Time You Have
With 10 to 15 minutes, choose guessing games, drawing, or board games. A longer gap allows building or a short walk.
Before starting, name the endpoint: one round, one picture, or one trip around the block.
Adapt Activities to Your Children's Ages
For preschoolers, simplify rules and use large, age-safe materials. School-age children can plan designs or invent clues, building creative problem-solving skills.
Older children can choose a helpful role in mixed-age play. They shouldn't have to entertain everyone or become the evening's babysitter. Consider different attention spans when choosing an activity.
Choose for the Adults' Energy, Too
Reading and guessing games suit a parent who needs to sit. Dancing, an obstacle course, or scavenger hunts demand more movement and supervision.
Choose something you can comfortably manage. A conversation while sorting laundry still counts as shared family time.
Common Challenges With Screen-Free Weeknights
"My Kids Ask for Screens as Soon as We Get Home"
If your family uses devices, make their place in the schedule predictable. The AAP's Family Media Plan can help organize those decisions.
Give advance notice, identify the next activity, and keep the basket visible. Introduce changes gradually and respond calmly.
"I Don't Have Time to Plan"
Keep three reusable ideas on the fridge rather than preparing something new daily. Add seasonal choices, including screen-free summer activities like supervised water play or sidewalk chalk, to a summer bucket list.
During a screen-free week, choose an idea at breakfast or cleanup, when you're already together.
A dependable favorite saves planning time. You don't need a different activity every evening.
"My Kids Have Different Ages or Interests"
Offer easier and more challenging versions of the same activity. Some options allow independent play alongside shared time, such as drawing while a sibling works on a puzzle.
Let each child choose one part. Parallel activities, like drawing beside a sibling doing a puzzle, also create shared time.
"Some Nights Everyone Is Tired"
Shorten the plan or choose something quieter. Read a few pages, chat while washing produce, or share one funny moment.
Screen-free family evening ideas should fit your household. A tired Tuesday doesn't need the same schedule as a relaxed Friday.
FAQs About Screen-Free Family Evening Ideas
What Are Easy Screen-Free Activities for a Busy Weeknight?
Try I Spy, a five-minute drawing prompt, or taking turns adding sentences to a story. Each can start within minutes.
How Can I Keep Kids Entertained Without Screens After Dinner?
Use a familiar sequence: clear plates, choose between two activities, then begin bedtime preparations. Keep the choices suited to everyone's energy.
What Can Families Do Together at Home Without Buying Supplies?
Tell stories, play charades, stretch, or build a supervised blanket fort. Paper, cushions, and empty boxes can support plenty of creative play.
How Long Should a Screen-Free Family Activity Last?
There's no single required length. Start with whatever fits, even five or ten minutes, and stop before the activity crowds out bedtime.
What Are Good Screen-Free Evening Activities for Toddlers and Preschoolers?
Picture books, animal movements, large-crayon drawing, and simple guessing games work well. Supervise closely and adjust each activity to the child's abilities.
How Can I Handle Kids Who Ask for Screens Every Night?
Give notice before the transition and name a concrete alternative. Keep expectations predictable, then adjust your approach if it doesn't suit your family.
What Are Quiet Screen-Free Activities Before Bedtime?
Read, color, complete a small puzzle, or share a gentle check-in. Choose activities you can pause without leaving a big cleanup job.
Start With One Activity That Fits Tonight
A screen-free evening can begin with one repeatable activity between dinner and bed. You don't need to fill every minute or prepare a perfect plan to make room for family connection.
Choose something that fits tonight's time and energy; in summer, pick an idea from your summer bucket list. Keep the supplies handy, and your family can begin a screen-free week with one repeatable activity, without planning every evening.
Autumn Memory Keeping: Save the Details That Make Fall Yours
A cold breeze slips under your sleeves, leaves crackle beneath your shoes, and the kitchen smells faintly of cinnamon. Autumn memory keeping gives those passing details somewhere to stay after the trees are bare and the holiday rush begins.
Photos matter, but they rarely hold the whole scene. A few written lines, a pressed leaf, a soup recipe, or a ticket from the county fair can bring back what the camera missed, including the people, weather, and feelings.
You don't need expensive supplies or an artistic streak. Begin with what is already within reach, then let the fall season move across the pages, from crisp mornings to darker evenings.
Key Takeaways
Autumn memory keeping preserves the sensory details, feelings, recipes, traditions, and ordinary moments that photos alone may miss.
Choose a format that fits your life, whether that is a memory journal, scrapbook, digital album, bullet journal, recipe binder, or memory box.
Use simple prompts, weekly habits, and small seasonal keepsakes to keep the process manageable and enjoyable.
Include imperfections, changing traditions, difficult moments, and the stories behind each memory to create a more honest seasonal record.
Dry and store natural materials carefully, use copies of important photos, and choose archival supplies for keepsakes you want to preserve for years.
Fall Ideas That Capture the Feeling of Autumn
Memory keeping is the practice of saving seasonal moments in a form you will revisit. Your collection might live in a notebook, memory journal, dot-grid journal, bullet journal, photo album, digital journal, or small memory box.
Choose the format that matches your real life. A daily diary suits dated entries, while a seasonal record works well with less frequent notes. If you enjoy flexible layouts, try a dot-grid journal or bullet journal. A traveler's notebook offers a compact option for recording moments on the go.
A digital album keeps photos and captions together without requiring extra supplies. A scrapbook gives you room to arrange photos, ticket stubs, and autumn leaves. A memory box works well for bulky items, such as a child's school photo, a theater program, a paper leaf from a classroom project, or a local festival map.
Meanwhile, a recipe binder can hold the food stories that return each year: the first pot of chili, a grandmother's apple cake, or cider served after a wet soccer game. The best system is the one you will actually revisit, not the one that requires the most work.
Click the image to purchase the Autumn Memory Keeping Journal
The materials matter less than the habit of noticing. For visual ideas, this autumn memory journal inspiration shows how warm paper, leaves, and small keepsakes can sit together on one page.
Start With the Small Moments You Usually Forget
Big events will probably make it into your camera roll. The tender details often disappear first: the first morning you wore a sweater, a pumpkin-colored sunset at school pickup, or a brief nature walk after rain.
Write down the date, place, weather, and who was there. Then add one sensory detail. Perhaps the air smelled like wet bark, the coffee tasted too bitter, or your dog carried a leaf halfway down the block.
Finish with one sentence about why the moment stayed with you. That small line turns a record into a memory. "We were all tired, but nobody wanted to go inside" can carry more feeling than a full page of description.
Or simply write a list of things you did that day. These small moments are often the most precious when you return to your journal.
Use Simple Prompts When the Page Feels Empty
A blank page can make even a treasured day feel hard to describe. Prompts remove the pressure to write something polished. Answer in one sentence, a paragraph, or a messy list.
Try these on different days:
What do I hope to remember about this autumn?
Which ordinary moment made me smile today?
What has autumn taught me this year?
What fall flavor brings back a strong memory?
What was my favorite autumn memory from childhood?
Which sound belongs to this season right now?
Some entries may hold gratitude. Others may hold frustration, grief, or change. Keep both. A seasonal record feels honest when it includes the rain-soaked afternoons as well as the golden ones.
Create a Fall Memory Journal Filled With Stories and Seasonal Details
A fall memory journal doesn't need matching pages. Let it hold short entries, grocery lists, rough sketches, book notes, weather observations, and photos printed at home. Use arrows when one thought leads to another. Draw boxes around favorite sentences. Write on a diagonal if the page calls for it.
A small scrapbooking kit is optional if you want to add simple decorative touches. Washi tape can attach a recipe, photo, or paper scrap without much effort.
The journal becomes more personal when it doesn't look like a store display. A coffee stain, crossed-out phrase, or crooked photo belongs there because it belongs to your real autumn. That kind of imperfection is still useful memory keeping.
Instead of trying to document every day, choose moments with texture. You don't need a daily diary to notice how the fall season unfolds. Record the first day your porch light came on before dinner, or save a description of the maple tree outside your window. If you prefer looking back, collect several moments in a monthly summary.
Record Recipes, Cozy Rituals, and Favorite Fall Flavors
Food carries a surprising amount of history. Tape in a recipe card for butternut squash soup or write the ingredients for the muffins your family requests when the weather cools. Beside it, add the date, who ate with you, and any detail that would make you smile years later.
A recipe becomes more than instructions when it includes a story. Write that you made chili after raking leaves, or that your child insisted on extra cinnamon in the applesauce.
Also save your smaller rituals. List the novel you read in your reading nook, the movie everyone watches in October, or the football season routine of radio broadcasts and game-day food. These comforting details create a record of cozy memory keeping without needing a staged photograph.
Keep a Fall Bucket List and Return to It Later
A short bucket list gives the season shape without turning it into a contest. Pick experiences you would miss if autumn passed without them, such as visiting an orchard, taking a nature walk, baking with family, attending a harvest festival, or watching a favorite movie.
Leave a few lines beneath each idea. When it happens, add the date and what actually occurred. Maybe the farm was crowded, the pie burned, or the walk ended early because of rain. Those imperfections usually become the story.
Tuck ticket stubs, receipts, and fully dry leaves beside the entry. You can find a simple example of using seasonal pieces in a journal through this autumn scrapbook ephemera idea.
A completed bucket list is less useful than the notes beside it. The unexpected parts are often what you will want to remember.
Turn Autumn Photos and Nature Finds Into a Personal Scrapbook
A scrapbook spread can tell a full story with two or three photos, one sentence, and a few physical pieces of the day. Build scrapbook pages around a trail photo, a small leaf, a torn paper background, and a caption about the wind. The same elements can also become part of a memory journal. The page will feel fuller than a grid of nearly identical pictures.
Use copies of important photographs rather than the only original. For keepsakes you hope to save for years, choose acid-free paper, photo-safe adhesive, and archival sleeves. Before storing leaves, flowers, or grass, dry them completely. Moisture can stain paper and encourage mildew.
If a nature find is too fragile, take a photograph or make a leaf rubbing instead. Collect only where it is allowed. Avoid removing plants, flowers, or seeds from protected land and public gardens.
Build Pages With Leaves, Color, and Found Paper
Autumn pages need no complicated design plan. Start with colors you saw outdoors, including autumn leaves, gold, deep orange, rust red, brown, and the blue-gray of an early evening sky.
Try a pressed-leaf collage, a leaf rubbing with crayon, or a painted leaf stamp using acrylic paint. Torn grocery bags, old envelopes, bakery paper, magazine clippings, kraft paper, and washi tape add texture without another shopping trip.
Handwritten captions work better than perfect titles. Write the words people actually said, such as "Save me the crunchy leaves" or "The cider is too hot." Those bits of speech return with their own voices intact.
Choose a Scrapbooking Style That Fits Your Time and Budget
Traditional 12-by-12 scrapbooks offer plenty of room for layered scrapbook pages and photo mats. Pocket pages are faster because photos and pocket cards slide into ready-made sleeves. Mini albums suit one trip, one family tradition, or one month. A memory journal page can combine photos, notes, and small keepsakes in a hybrid layout. Digital layouts work when you prefer editing photos on a computer.
A memory box may be the best option when you dislike gluing anything down. Put items into labeled envelopes, then sort them into pages later, or leave them as a seasonal archive.
Household paper and printed photos are enough to begin, so you don't need a complete scrapbooking kit. For a few themed accents, retailers and brands such as Scrapbook.com, Etsy, Spellbinders, Oriental Trading, and Stampin Up offer fall paper, designer series paper, stickers, and die-cuts. This autumn harvest scrapbook collection can also spark ideas for color and page elements.
Preserve Fall Traditions So They Can Be Shared for Years
Traditions are often remembered in fragments. Someone recalls the apple butter, while someone else remembers a football game on the radio during football season. A child may remember only wearing halloween costumes that scratched their neck.
Write the story while the people involved can still add their pieces. Document who takes part, when the tradition began, what you eat or do, where it happens, and what has changed. Include the ordinary logistics, too. They reveal how life looked at that time.
Tell the Story Behind a Tradition
Give each recurring tradition a page or pocket in a memory journal. A daily diary captures one day, but this record can show how a tradition develops over time. Add an origin story, a photo, a menu, a recipe, a favorite quote, or a copied text message that made everyone laugh.
Ask relatives direct questions. What did fall feel like in their childhood? Which meal did they expect every year? Did the tradition start because of money, work schedules, faith, a move, or pure accident?
Make room for family memories from children, relatives, and everyone else involved. Their spelling may be uneven and their drawings may be wild, but their view of the day will be impossible to recreate later.
Make Space for New Traditions and Changing Seasons
The fall season may bring new homes, new babies, losses, breakups, or empty chairs at the table. Record the new routines as they form. A tradition can be as small as taking one photo on the last day of autumn or choosing a new soup to make each November.
Add reflections about comfort, friendship, gratitude, and what you want to carry into winter. Note what worked, what felt forced, and what you want to repeat. The collection should show change, not hide it.
Make Seasonal Memory Keeping Easy to Finish and Enjoy
Keep the project contained. Choose one notebook, album, folder, or box for the whole season. Store loose items in one labeled envelope until you have time to sort them.
Set aside ten minutes each week. Add dates while they are fresh, back up digital photos, and print only the pictures that make you pause. An unfinished page still counts, so leave it imperfect instead of abandoning it. Your system can stay analog, digital, or mixed.
Use a Weekly Rhythm for Photos, Writing, and Keepsakes
A modest routine keeps Autumn memory keeping from becoming another chore. Use habit stacking by attaching it to an existing Sunday or end-of-week habit, such as backing up photos. This small repeatable practice makes memory keeping easier than maintaining a daily diary.
At the end of each week, choose one photo, write three sentences, add one sensory detail, and save one small paper item or nature find in a memory journal. A bullet journal, digital note, or mixed folder can hold the checklist.
That rhythm may capture a bookstore receipt, a photo of rain on the windshield, and a note about the first frost or football season's first game. Over twelve weeks, those small records can become scrapbook pages and a full seasonal story without daily pressure.
Let the Finished Collection Tell a Complete Seasonal Story
End with one closing page, or use it as a monthly summary of the weeks behind you. Write about your favorite moments, the people who shaped the season, something you learned, and one hope for the months ahead.
Then revisit the collection with family or open it next autumn. You may notice patterns in the meals you repeat, the places you return to, and the ways each year changes.
Frequently Asked Questions
What is autumn memory keeping?
Autumn memory keeping is the practice of saving seasonal moments in a journal, scrapbook, digital album, memory box, or another format. It combines photos with words, recipes, keepsakes, and sensory details that help bring the season back to life.
Do I need special supplies to start?
No, you can begin with a notebook, printed photos, household paper, and items you already have. Add scrapbook supplies such as washi tape or stickers only if they make the process more enjoyable.
What should I include in a fall memory journal?
Include dates, places, weather, people, sensory details, favorite recipes, seasonal routines, photos, and small paper keepsakes. Short lists, rough sketches, and imperfect notes are just as valuable as polished pages.
How can I keep autumn memory keeping from becoming a chore?
Set aside about ten minutes each week and choose one photo, three sentences, one sensory detail, and one small keepsake. Store loose items in a labeled envelope and leave unfinished pages imperfect rather than abandoning the project.
How should I preserve leaves and other nature finds?
Dry leaves, flowers, and grass completely before placing them near paper, since moisture can cause stains or mildew. If an item is too fragile, photograph it or make a leaf rubbing, and collect only where it is permitted.
A Season Worth Saving
The practice begins with attention, not perfection. Write down one small moment, press a dry leaf, print a photo, or save the recipe that returns when the air turns cold.
Fall's ordinary details often become the memories you treasure most, saved in a memory journal.
20 Old-Fashioned Ways to Enjoy the Last Days of Summer
A porch glows at sunset, ice clinks in a glass of lemonade, children race across the yard, and crickets begin their evening song. Those ordinary sounds and rituals evoke a nostalgic summer, creating the warm atmosphere of a retro summer evening.
The best old-fashioned ways to enjoy the last days of summer are simple old-fashioned summer activities. They don't require a packed calendar or a big budget, and they offer a relaxed alternative to racing through every item on a summer bucket list. Set gentle screen time limits for phones and tablets, then put them away for a while and enjoy electronics free fun. Pick one idea and let the evening stretch, embracing the slower mindset of a retro summer.
Key Takeaways
Old-fashioned summer activities are simple, low-cost ways to slow down and enjoy the final warm evenings.
Porch time, outdoor reading, homemade treats, farmers market meals, and dinners in the open air can turn ordinary days into lasting memories.
Classic outdoor fun includes swimming, backyard camping, firefly watching, lawn games, picnics, and sunset outings.
Neighborhood traditions such as potlucks, lemonade stands, handwritten letters, and family game nights bring people of all ages together.
Choose one tradition to repeat next year, creating a relaxed rhythm that keeps the feeling of summer alive.
Old-Fashioned Ways to Enjoy the Last Days of Summer
Quiet rituals make the season feel less like a countdown. These small pleasures recreate the slower pace of a retro summer on an ordinary weekday evening.
1. Settle Into a Porch Swing With a Cold Glass of Iced Tea
Pour sweet tea, unsweetened tea, or homemade lemonade over plenty of ice. Then claim a porch swing, front steps, or two lawn chairs and watch the neighborhood settle down.
Bring a deck of cards if conversation needs a nudge. A few easy rounds can turn the evening into a relaxed family game night. Otherwise, listen for sprinklers, bicycles, and the first crickets. Leave phones inside for half an hour.
2. Read a Real Book Under a Tree or on a Blanket
Grab your coffee, choose the first paperback, library book, or old magazine on a low-pressure summer reading list. A shady tree, hammock, porch chair, or picnic blanket is enough.
Reading outdoors has a different pace when notifications can't interrupt every page. Children can turn the reading spot into a simple blanket fort for extra fun. Pack a cold drink and stop when the light begins to fade.
Click image to purchase
3. Pick Berries and Wildflowers While They're Still Around
Try berry picking at a local pick-your-own farm, choosing blackberries, blueberries, or late peaches. Turn the haul into a simple cobbler, shortcake, or bowl of fruit with cream.
On a walk, gather wildflowers only where picking is permitted. Never eat unknown berries or plants, and leave protected areas untouched. A few stems in a Mason jar make a simple summer crafts project and can brighten the kitchen table for days.
Just one warning: Be aware of bees when picking berries!
4. Shop the farmers market for One Last Summer Feast
Go early and buy whatever looks best, perhaps tomatoes, sweet corn, peaches, basil, berries, or a crusty loaf of bread. Let the market decide dinner instead of following a strict recipe.
Ask growers how they like to cook a vegetable you've never tried. That small conversation is part of the pleasure, along with eating food that hasn't traveled across the country.
5. Eat Dinner Outside and Watch the Sunset Fade
Set the picnic table with mismatched plates, grilled corn, sliced tomatoes, and watermelon. A regular Tuesday meal feels special outdoors.
Skip television and stay long enough to see the sky move from gold to blue-gray. The habit gives everyone a natural reason to linger after the plates are cleared.
Simple Outdoor Fun for Summer's Final Warm Evenings
A sprinkler, a flashlight, and a little open space can still entertain a whole group. These low-cost outdoor activities include backyard games and retro summer fun for a yard, campground, lakefront, or public park. Check the weather and local rules first.
6. Make Homemade Ice Cream or Lemonade Popsicles
Homemade ice cream is easy with an ice cream maker, but the old freezer-bag method is fun too. Seal the mixture in a small bag, then shake it inside a larger bag filled with ice and salt. For popsicles, use lemonade with crushed berries, peach puree, or yogurt and honey.
The stirring, waiting, and taste-testing matter as much as dessert. Southern Living's old-fashioned summer ideas offer more reminders of why homemade treats still belong in a backyard summer.
7. Run Through the Sprinkler or Start a Water Balloon Fight
Turn on the sprinkler before dinner and let kids, teenagers, and willing adults get soaked. A water balloon fight or gentle Super Soaker contest can extend the fun.
For larger groups, follow the water play with relay races. This kind of unstructured outdoor play keeps everyone moving and laughing.
Keep towels nearby and set a rule against aiming at faces. Afterward, collect every balloon scrap from the grass so pets and wildlife don't find them later.
8. Plan One Last Swim at a Lake, Beach, or Public Pool
Choose a warm afternoon, pack towels and a picnic, then end with ice cream on the way home. Check pool hours, weather alerts, water conditions, lifeguard coverage, and posted rules before leaving.
A final swim has become a familiar late-summer ritual for good reason. It belongs among classic summer activities, and Highlights' classic summer activity list offers more simple ideas for making the most of a warm day.
9. Sleep Under the Stars With a Backyard Campout
Backyard camping can mean sleeping bags in a tent or under the open sky. Add flashlights, bug spray, snacks, and scary stories that stay silly enough for the youngest camper.
Keep food sealed and follow local fire rules if you plan to use a fire pit. Rain doesn't have to cancel the night, either. Move blankets indoors and turn the living room into a blanket fort.
10. Catch Fireflies at Dusk, Then Let Them Go
At twilight, try a nature scavenger hunt for leaves, insects, and evening sounds before watching the yard blink with tiny lights. You can watch without catching any, or use a ventilated jar for a few minutes before releasing fireflies where you found them.
Handle insects gently and never keep them overnight. Their brief glow is more memorable when it stays wild.
A firefly jar should be a moment of observation, not a souvenir.
Classic Summer Outings That Turn Into Lasting Memories
For many American families, Labor Day feels like the unofficial close of summer. Choose one meaningful outing for a final weekend, giving your summer bucket list an unhurried, retro summer memory.
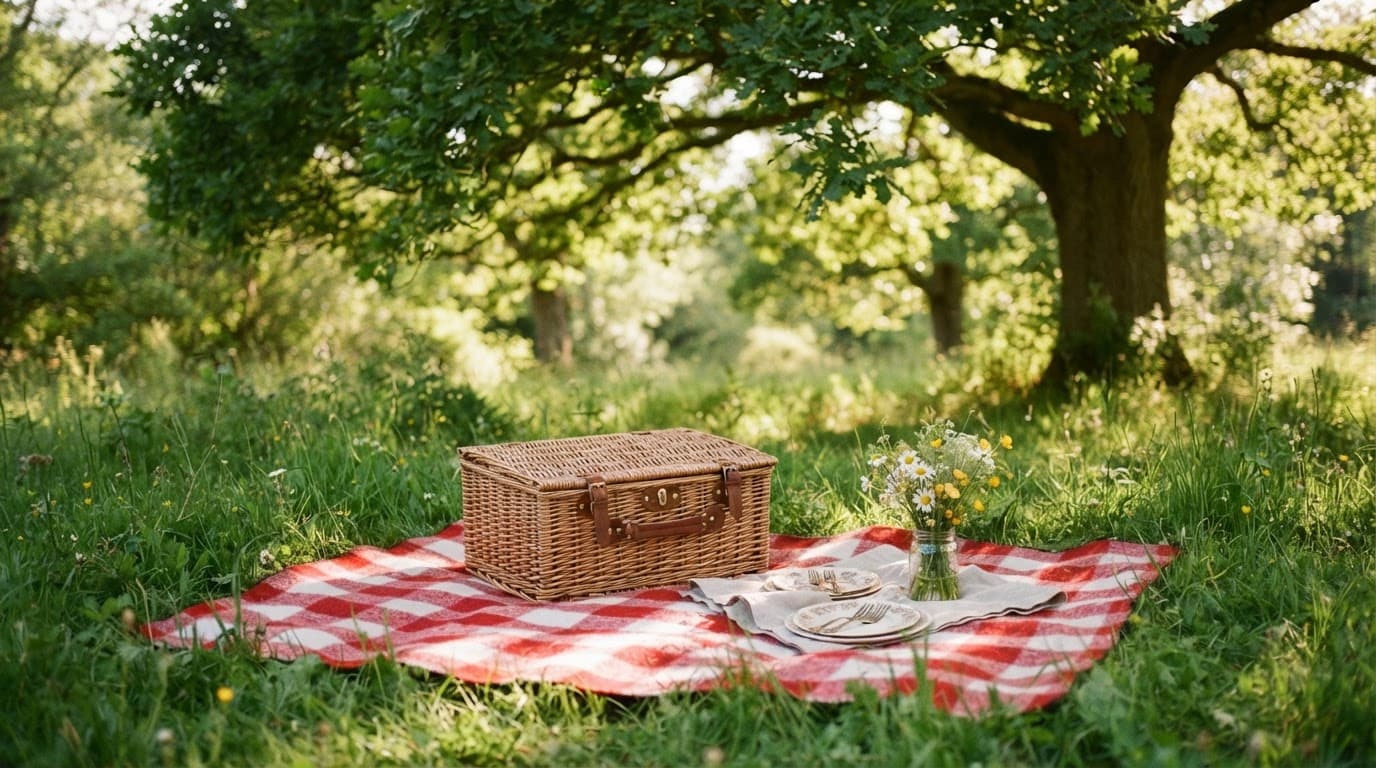
11. Pack a Basket for a Proper Old-Fashioned Picnic
Fill a basket with sandwiches, watermelon, homemade cookies, fruit, and iced tea. Bring a blanket plus one or two traditional games, such as frisbee or a pack of cards.
A shady park, riverbank, town green, or quiet lake edge works beautifully. Pack out every crumb and wrapper, especially near water.
12. Go to a Drive-In or Build a Backyard Movie Screen
A drive-in theater gives the evening its own kind of magic, with car speakers, blankets, and popcorn under the stars. If none is nearby, hang a white sheet and use a projector in the backyard.
Choose a family-friendly classic, plan for mosquitoes and cooler air, and use a cozy blanket fort indoors if rain interrupts the backyard movie. Follow any venue or licensing rules, and make root beer floats a fine intermission treat.
13. Watch a Local Baseball Game From the Bleachers
Minor-league, high school, and community games cost less than major-league tickets, yet they carry the same crack-of-the-bat excitement. Bring a cap, scorecard, peanuts, and enough patience to enjoy the spaces between plays.
Arrive early to hear the music, see the field in the sun, and find good seats. The shared attention makes even a close game feel like an occasion. Years later, it may become part of lasting childhood memories.
14. Visit a County Fair, Carnival, or Small-Town Festival
Follow the smell of fried dough, lemonade, and grilled corn. County fairs often combine livestock displays, craft booths, live music, rides, and ridiculous games that nobody needs to win.
Set a spending limit before you enter, drink water, and check the schedule for shows or fireworks. A local event can feel more personal than a crowded attraction.
15. Take a Slow Sunday Drive to a Nearby Town or Lake
Choose a scenic route and leave room for unplanned stops. Browse a historic main street, buy peaches at a roadside stand, walk a lake trail, or pause at an overlook.
Bring paper maps or make a playlist that doesn't need constant skipping. These old-fashioned ways to enjoy the last days of summer leave space for the pleasant surprise of finding somewhere new close to home.
Neighborhood Traditions That Bring Everyone Outside
Older summer memories often include neighbors, cousins, and friends who wandered over after dinner. Keep the invitation casual, and make room for every age. That easygoing rhythm is part of a retro summer experience.
16. Set Up a Lemonade Stand for a Good Cause
Kids can squeeze lemons, make a hand-drawn sign as one of their summer crafts, and offer cold cups to passersby. Choose a local food pantry, animal shelter, or other cause for the proceeds.
An adult should supervise, help with food safety, and get permission for the location. A QR code for cashless donations can help, but a jar of change still feels right.
17. Host a Backyard Potluck or End-of-Summer Backyard Barbecue
Ask every guest to bring one dish, drink, or dessert. Set a spending limit so the host doesn't spend the whole party at the grill.
Serve burgers, grilled corn, pasta salad, watermelon, and cobbler. These relaxed summer parties can continue into a family game night with cards or board games after dinner. End-of-summer tradition ideas can spark a simple annual ritual, but the best gathering has room for lawn chairs, second helpings, and no tight schedule.
18. Play Croquet, Badminton, Cornhole, or Tag Until Dark
Borrow equipment if you don't own it, then choose a few backyard games instead of organizing a formal tournament. Chalk marks can create boundaries, and small prizes can be as simple as first pick of dessert.
These activities encourage outdoor play across generations. Older kids and adults may enjoy Ghost in the Graveyard when the light gets low, while relay races work for nearly any age. For a hot evening, add a water balloon fight, then remind everyone to help with cleanup. Outdoor activity ideas for kids can help fill the gaps between games.
19. Write and Mail a Handwritten Summer Letter
Write to a grandparent, camp friend, old neighbor, or faraway relative. Mention the funny moments, favorite meal, or one thing you hope to do next summer.
Add a printed photo, pressed flower, drawing, or recipe card. A mailed letter has a weight and permanence that a quick text can't match.
20. Make a Small Summer Memory Album
Print a few photos instead of saving hundreds unseen in a camera roll. Add ticket stubs, a pressed leaf, a child's drawing, or printable caption cards and memory prompts.
Spend one final family evening choosing what belongs on the page. Then pick one tradition to repeat next year, whether it's the picnic, the porch tea, or the last swim.
Click image to purchase.
Frequently Asked Questions
What are some easy old-fashioned summer activities?
Try porch sitting with iced tea, reading under a tree, eating dinner outside, playing lawn games, or watching fireflies at dusk. These activities require little planning and help everyone enjoy a slower summer evening.
How can I enjoy the last days of summer on a budget?
Pack a picnic, visit a public park, host a potluck, take a scenic drive, or organize a backyard movie night. Homemade lemonade, ice cream, and simple games can make the day feel special without a large expense.
What are good end-of-summer activities for families?
Families can plan one last swim, camp in the backyard, attend a local fair, play croquet or badminton, and create a small memory album. Choose activities that allow different ages to participate without a strict schedule.
How can I make an end-of-summer tradition last?
Pick one simple activity, such as a porch tea, final picnic, or backyard barbecue, and repeat it each year. Adding a handwritten note, printed photo, or memory album can make the tradition feel more meaningful over time.
What should I remember when planning outdoor summer activities?
Check the weather, local rules, water conditions, and venue hours before heading out. Bring water, sunscreen, insect repellent, towels, and a plan for cleaning up so the fun remains safe and comfortable.
Keep the Last Light a Little Longer
The strongest summer memories usually grow from simple summer pleasures: food shared outdoors, laughter over a crooked lawn game, and people giving one another their full attention. They don't need a perfect plan.
Choose one of these old-fashioned ways to enjoy the last days of summer this week, then repeat it next year. That is the feeling of a retro summer: porch lights will come on, fireflies will rise, and the final sunset will look better when you're there to see it. A family game night can become that kind of tradition next year.
( Please note: I deleted the sales weeks because they were incorrect. I’m sorry for any inconvenience or confusion this caused.)
Back-to-School Prep for Parents Without the Panic
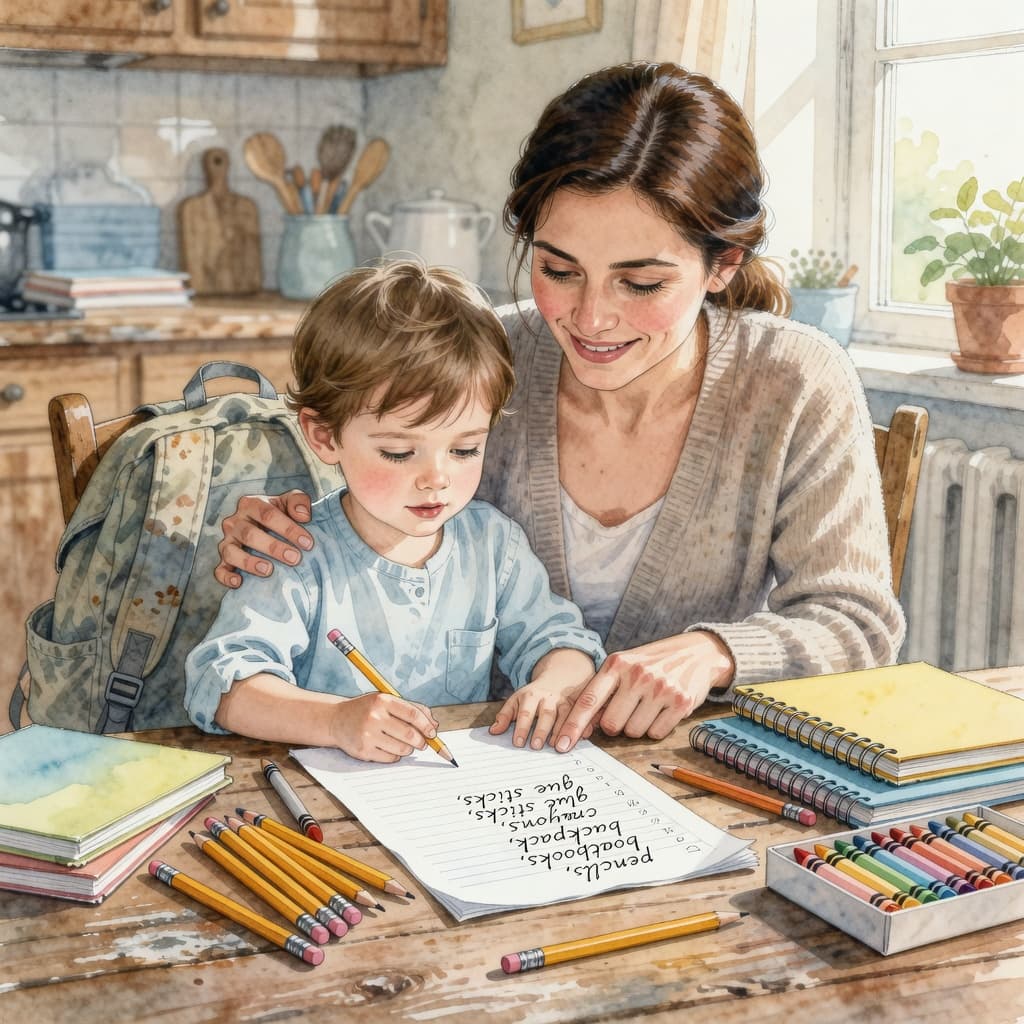
Every August has its own little stampede: the missing sneaker, the half-used glue sticks, and the email with forms you forgot to open. If your kitchen counter looks like a school supply aisle exploded, you are in good company.
Effective back-to-school planning now can save time, stress, and money later. A comprehensive back-to-school checklist can help you manage your tasks, from gathering supplies and handling health requirements to rebuilding routines before the first bell rings for the new academic year.
Key Takeaways for Successful Back-to-School Planning
Verify back-to-school requirements first: Always consult official school lists before shopping to avoid buying unnecessary duplicates or the wrong specific models of supplies.
Prioritize health and school logistics: Schedule physicals, vaccinations, and medication plans early to ensure you meet all school safety deadlines before the academic year begins.
Ease into back-to-school routines: Transition your child to earlier sleep and wake-up times gradually, and practice morning routines to reduce stress on the first day.
Audit and reuse supplies: Before hitting the stores, conduct an inventory of your home to reuse existing items, saving both money and time during the back-to-school rush.
Focus on comfort and utility: Select backpacks and lunch gear that are functional and easy for your child to use independently, rather than prioritizing trends.
Start with the school list, budget, and the right school supplies
The fastest way to waste money in July or August is guessing. Schools often post school supplies online now, and teachers may also share class-specific notes that change what you actually need.
Find the exact school supply list before you shop
Before you buy a single folder, check the school website, parent portal, district app, teacher email, and open house handouts for your official school supply list. Many schools also work with tools like TeacherLists or School Tool Box, which can cut down the hunt when you are short on time.
Wait for the official list if you can. A first-grade class may want crayons and glue sticks, while an older elementary class may ask for composition books, headphones, and dry-erase markers. Middle school teachers often split supplies by subject, and sticking to their requirements aids in their classroom management and overall efficiency. Following these directions helps you avoid duplicates. Families often buy a planner, headphones, or calculator early, then find out the school already provides one or wants a different model.
Choose school supplies that work for your child, not just the checklist
A backpack has to fit your child, not only match the trend of the moment. Look for padded straps, a size that does not swallow a smaller kid whole, and zippers your child can open without a wrestling match before 8 a.m.
The same rule applies to lunchboxes and water bottles. A leak-proof lunch box and a BPA-free water bottle sound basic, but they matter more than a fancy print when the school day gets busy. Younger kids usually do better with containers they can open on their own. Older students may need a planner, binders, subject dividers, a calculator, headphones, or a charger if their school uses devices.
Some children also need sensory-friendly choices. Softer pencil grips, wider backpack straps, smooth lunch gear, or less noisy closures can make the day easier without changing the whole list.
Set a simple budget and reuse what still works
Before you shop, dump last year's backpack, desk drawer, and kitchen catch-all onto the table. You may already have scissors, rulers, unopened pencils, a usable binder, or a lunch bag that only needs a wash. Reuse first, then replace what is worn out. If you are looking for helpful organization tips, consider keeping a running inventory of what you already own to prevent overbuying.
After that, compare basics at Walmart, Target, and Amazon before you check out. A plain folder, notebook, or box of pencils can swing in price depending on the week. Shared notes in Any.do, Todoist, or even a phone list can also stop duplicate buys when two adults shop separately.
That timing matters because MRI-Simmons reports that 78% of parents plan shopping around seasonal sales events. Buy the non-negotiables first, such as notebooks, pencils, an ergonomic backpack, a lunch box, and a water bottle, then wait on extras until your child and teacher settle into the year.
Get health, forms, and school safety tasks done early
School paperwork has a way of hiding until the last week, often complicating your overall school preparation. Health tasks can feel tedious until a deadline suddenly lands on top of soccer practice, work, and a supply run.
Book checkups and update vaccinations before the rush
If your child needs an annual checkup, schedule their well-child visits before late-summer calendars fill up. The same applies to sports physicals, especially for middle school and high school students who require clearance before practice sessions begin.
Vaccination rules vary by state and district, so check your school requirements early. Depending on age and local policy, families may need records for vaccines like Tdap or MMR. If your child takes daily medicine, now is also the time to request refills and ask the pediatrician for any necessary school forms.
Send in forms and medication plans the school needs
Schools cannot guess what your child needs, even when a condition seems routine at home. If your child uses an inhaler, EpiPen, diabetes supplies, or other medication during the day, send the required forms, clear instructions, and labeled items before the first day if possible. Proactive teacher communication is essential for ensuring staff understand your child's specific needs before classes begin.
Keep labels simple and easy to read. Put your child's name on the medication, lunch gear, water bottle, and backpack, and keep digital copies of forms in your phone or a shared family folder.
Health support involves more than just medicine. If your child has anxiety, ADHD, food allergies, asthma, or other learning differences, early coordination helps. Children's Hospital Colorado's back-to-school tips also remind parents to talk with the school about mental health concerns before small problems grow during the first few weeks.
Refresh your home health kit for the school year
A small home kit can save a panicked pharmacy trip on a Tuesday night. Check the thermometer battery, restock tissues and hand sanitizer, and look at expiration dates on basic medicines you already keep at home.
Follow your school rules on what can go into a backpack or classroom. Most importantly, if your child wakes up with a fever, keep them home and follow the return-to-school policy. Children should go back only after they are fever-free without fever-reducing medicine for the period the school requires.
Build routines that make school mornings smoother
Mornings don't have to feel like a relay race. A few steady daily routines can turn a chaotic start into something far more manageable, especially during the last two weeks before school begins.
Shift bedtime and wake-up time before the first day
Don't wait until the night before school starts to fix summer sleep. Move bedtime and wake-up time earlier in 10 to 15 minute steps every few days so the change feels gentle. Establishing a consistent bedtime routine helps signal to your child that it is time to wind down.
Small sleep shifts work better than one sudden early bedtime.
It also helps to pull screens back before bed. Younger kids usually settle faster with a short, calm routine. Older kids often do better when phones charge outside the bedroom and clothes are laid out the night before.
Set up a homework station that is quiet and ready to use
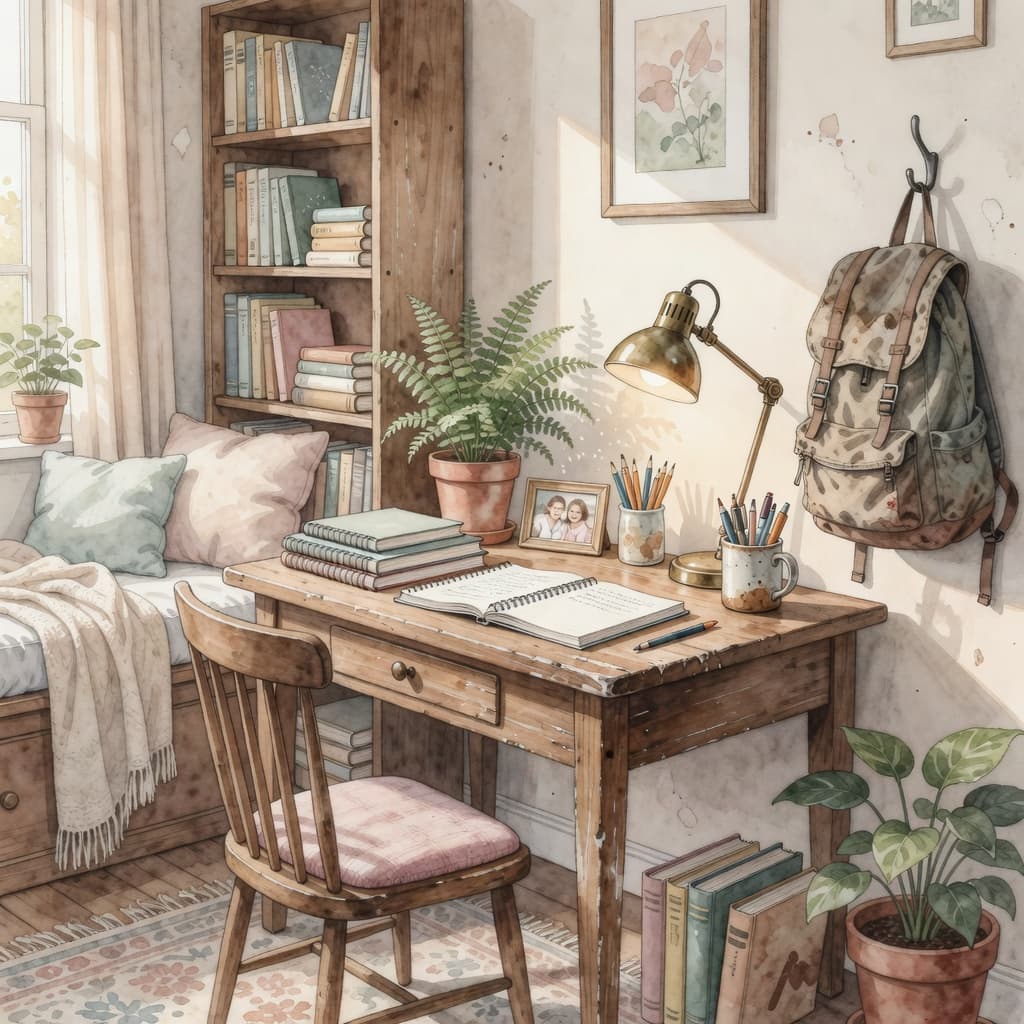
Your child doesn't need a picture-perfect study room. A clear corner of the kitchen, a small desk in the bedroom, or one end of the dining table can work as a dedicated study space if the basics stay within reach.
Set out paper, pencils, a sharpener, good lighting, and a comfortable chair. If space is tight, keep supplies in one basket so cleanup takes less than a minute. Older students may also need a charging cable, headphones, and a place to keep school-issued devices safe.
Practice the morning routine before school starts
A dry run makes the first real morning feel familiar. Have your child get dressed, eat breakfast, fill the water bottle, pack the backpack, and put shoes and jackets in the same spot a few days in a row to solidify the morning routine.
You can also practice the small things that trip kids up, such as opening lunch containers, zipping the backpack, or remembering where the folder goes. For a few extra transition ideas, KLA Schools shares back-to-school adjustment tips that fit well with routine practice at home.
Make the first week feel familiar, not frantic
The human side of school prep matters as much as the shopping bag. Children do better when the day feels known, even if they are still nervous about the upcoming first day of school.
Walk through the school day before it begins
If your school offers an open house, go. Let your child see the classroom, cafeteria, bathrooms, playground, or locker area before the first day of school crowd arrives.
At home, talk through the daily routine in simple order. Younger kids may want to hear what lunch, recess, and dismissal look like. Older students often feel better after reviewing a class schedule and figuring out where their rooms are located.
Sort out transportation, pickup, and after-school care
Bus numbers, carline rules, and pickup windows deserve attention before day one. If your child rides the bus, confirm the route, stop time, and whether the school uses tags or ID cards for younger students. If you drive, learn the pickup pattern so you do not discover it in a line of fifty cars.
After-school care needs the same clarity. Confirm the babysitter, nanny, family member, carpool, or school program, and build a backup plan for early dismissal days, work meetings, or a missed bus. A shared calendar can hold bus times, pickup codes, teacher names, and school holidays in one place.
Create a master family calendar that lists all school start times, bus schedules, and extracurricular activities in one central, color-coded location. Assign each child a dedicated bin or station near the door for their specific gear to prevent mixing up supplies or backpacks during busy mornings.
You should also establish a staggered morning routine that accounts for the earliest departure time, ensuring that even children with later start times follow a consistent, predictable rhythm. Simplifying the process for yourself is key, so focus on prepping lunches and outfits the night before to reduce the daily scramble.
Help your child feel ready and less nervous
Most kids carry a mix of excitement and worry, even when they do not say much. Ask what they are looking forward to, what feels hard, and what one small goal for the year might be. Engaging in simple goal setting helps build excitement, and discussing their academic goals can provide a sense of purpose.
Keep your tone calm. You do not need a long speech. A child usually feels safer when you name the feeling, remind them what will stay the same, and point to one familiar part of the day. Reminding them of familiar faces builds social confidence and encourages self-advocacy, whether that is a friend on the bus, a favorite subject, or the snack packed in their lunch.
Frequently Asked Questions
How can I save money on back-to-school shopping?
Start by checking what supplies you already have at home to avoid redundant purchases. Compare prices across major retailers like Amazon, Walmart, and Target, and try to time your major purchases around seasonal sales events in July.
What should I do if my child needs medication during the school day?
Contact your pediatrician well before the first day to request necessary forms and ensure prescriptions are refilled. You must provide the school with clear, labeled instructions and the required documentation so staff can safely manage your child’s needs.
When should I start adjusting my child's sleep schedule?
It is best to start adjusting sleep schedules about two weeks before school begins. Move bedtimes and wake-up times earlier by 10 to 15 minutes every few days to make the transition feel natural rather than sudden.
How can I help my child feel less nervous about the new school year?
Spend time discussing the upcoming schedule, visit the school during an open house, and encourage your child to share their feelings. Focus on highlighting familiar aspects of their day and setting small, achievable goals to build their confidence.
A lighter start to the school year
Effective back-to-school preparation works best when it remains simple. By following these back-to-school tips, such as buying only what is necessary, handling health forms before the rush, and rebuilding sleep routines, you set the stage for a calm transition. Encouraging active parent participation further eases the process, ensuring that your home environment supports the upcoming academic year.
The goal is not to achieve a perfect first day. Instead, it is to create a lighter experience for you and your child, fostering the foundation for long-term student success. A little proactive planning now can carry that sense of ease far past the beginning of the academic year.
Creating a Cozy Valentine’s Day at Home: Simple Ways to Celebrate with Family
Valentine’s Day doesn’t have to be expensive, crowded, or overly complicated to be meaningful. Some of the sweetest celebrations happen right at home, wrapped in comfort, togetherness, and simple traditions. Creating a cozy Valentine’s Day at home is a wonderful way to slow down, focus on family, and celebrate love in all its everyday forms.
Whether you have young children, grown kids, or simply want a peaceful evening at home, these simple Valentine’s Day ideas will help you create a warm and memorable atmosphere without stress.
Set the Mood with Cozy Valentine’s Day Decor
You don’t need elaborate decorations to make your home feel special for Valentine’s Day. A few thoughtful touches can instantly create warmth and charm.
Soft lighting with lamps, fairy lights, or candles
Cozy throws and pillows in soft reds, pinks, creams, or neutrals
Simple heart garlands, paper crafts, or fresh flowers
A seasonal centerpiece for the dining or coffee table
Keeping Valentine’s Day decor cozy and understated helps your home feel welcoming rather than cluttered, perfect for relaxed family time.
Plan a Simple Family Valentine’s Day Meal
A cozy Valentine’s Day at home often centers around food—but it doesn’t need to be fancy. The goal is togetherness, not perfection.
Ideas for a family-friendly Valentine’s meal:
Homemade pizza with heart-shaped crusts
Breakfast for dinner with pancakes or waffles
A soup and bread night for a comforting winter meal
A build-your-own pasta or taco bar
Finish the evening with an easy dessert like brownies, cookies, or hot cocoa topped with whipped cream. Letting everyone help in the kitchen makes the meal feel like a shared experience.
Create Simple Valentine’s Day Traditions
Small traditions are often what children and families remember most. Valentine’s Day is a perfect opportunity to start one.
Some simple family Valentine’s traditions:
Writing short notes of appreciation for each family member
Sharing one thing you love or appreciate about each other
Reading a favorite book together or watching a family movie
Exchanging small handmade or meaningful gifts
These moments encourage connection and remind everyone that Valentine’s Day is about love, not just romance.
Cozy Valentine’s Day Activities for the Whole Family
Keep the evening relaxed with activities that encourage togetherness and comfort.
Valentine’s Day crafts with paper, markers, and stickers
A family movie night with cozy blankets
Baking together and decorating cookies
Board games or card games by candlelight
These cozy Valentine’s Day activities help create a peaceful rhythm and give everyone a chance to unwind.
Embrace a Slow, Meaningful Valentine’s Day at Home
One of the best parts of celebrating Valentine’s Day at home is the slower pace. There’s no rushing from place to place, no reservations to keep—just time to enjoy being together.
Put phones away, turn on soft music, and allow the evening to unfold naturally. Even simple moments—laughter at the table, shared stories, or quiet conversation—can become cherished memories.
A Cozy Valentine’s Day Is About Love at Home
Creating a cozy Valentine’s Day at home doesn’t require perfection, expensive gifts, or elaborate plans. It’s about nurturing love within your home, appreciating one another, and creating a space where everyone feels valued.
This Valentine’s Day, let your home be the heart of the celebration—warm, welcoming, and filled with the simple joy of family.
Memory-Keeping at Home: Preserving Your Family’s Winter Moments
Winter has a unique way of softening time. The pace of life slows, the days grow quieter, and home becomes the center of everything. While other seasons rush by in a blur of activity, winter gently invites us to pause, notice, and remember. This makes it the perfect season for memory-keeping at home—a meaningful practice that helps preserve your family’s winter moments long after the snow has melted.
From simple journaling to treasured keepsakes tucked into boxes, winter memory-keeping isn’t about perfection or productivity. It’s about honoring everyday moments and turning them into lasting reminders of love, comfort, and connection.
Why Winter Is Ideal for Memory-Keeping at Home
Unlike summer or fall, winter naturally encourages reflection. The early evenings, cozy indoor routines, and quieter calendars give us space to look inward and appreciate what truly matters.
Winter memory-keeping helps you:
Capture ordinary moments that might otherwise be forgotten
Strengthen family bonds through shared reflection
Create heirlooms for future generations
Practice gratitude during a season that can feel heavy or rushed
Memory-keeping doesn’t require artistic talent or expensive supplies. All it asks is attentiveness and a willingness to see beauty in everyday life.
What Memory-Keeping Really Looks Like
Many people assume memory-keeping must be elaborate—scrapbooks filled with perfect layouts or journals written daily without fail. In reality, memory-keeping can be gentle, imperfect, and deeply personal.
It can be:
A few sentences scribbled in a notebook
A photo tucked inside a drawer
A handwritten note saved from a winter evening
A box filled with meaningful odds and ends
What matters is not how much you keep, but why you keep it.
Simple, Cozy Ways to Preserve Winter Memories
1. Start a Family Winter Journal
A winter journal is one of the easiest and most meaningful ways to preserve family memories. It doesn’t need to be daily or detailed. A few entries a week are more than enough.
You might include:
Favorite winter activities or traditions
Funny things children say or do
Weather notes (“First snow of the year!”)
Gratitude lists from cozy days at home
Reflections on how the season feels
Consider leaving the journal in a shared space so everyone can contribute. Years from now, these simple entries will feel priceless.
2. Create a Seasonal Memory Box
A winter memory box is a wonderful way to collect physical reminders of the season. Choose a small box, basket, or tin and label it with the year.
Ideas for what to include:
Holiday cards and gift tags
Ticket stubs from winter outings
Small crafts or drawings
Written prayers or blessings
Notes about favorite meals or traditions
At the end of winter, seal the box and store it away. Opening it in future years becomes a tradition filled with warmth and nostalgia.
3. Document the Everyday Moments
Not every memory needs to be tied to a holiday or special event. Some of the most meaningful winter memories are found in ordinary routines.
Consider documenting:
Snow boots drying by the door
Baking afternoons in the kitchen
Reading together on dark evenings
Candlelit dinners on cold nights
Quiet mornings with coffee and journals
A single photograph, paired with a short note, preserves these moments beautifully.
4. Scrapbook Winter Memories—Simply
Winter scrapbooking doesn’t need to be complicated or time-consuming. Instead of large projects, try:
One-page seasonal layouts
Photo + journaling card combinations
Neutral winter color palettes
Soft textures like kraft paper, linen, or vellum
The goal is storytelling, not perfection. Even a handful of pages can tell the story of an entire season.
5. Write Letters to the Future
One of the most powerful forms of memory-keeping is letter writing. Winter is an especially meaningful time to write words meant for the future.
Ideas include:
Parents writing letters to their children
Grandparents writing to grandchildren
Couples writing to one another
Individuals writing reflections to their future selves
Seal the letters and date them. Opening them years later creates an emotional connection that few keepsakes can match.
Making Memory-Keeping a Winter Ritual
Memory-keeping is most sustainable when it becomes part of your seasonal rhythm rather than another task on your to-do list.
Try turning it into a cozy ritual:
Choose one evening a week
Light a candle or make a warm drink
Play soft music
Invite family members to participate
These quiet moments often become cherished memories themselves.
Memory-Keeping for Emotional Well-Being
Winter can be a tender season emotionally. The shorter days and quieter pace often bring reflection, nostalgia, and sometimes sadness. Memory-keeping offers a gentle way to process these feelings.
By recording gratitude, preserving joyful moments, and acknowledging emotions honestly, memory-keeping becomes a form of self-care. It reminds us that even in quiet or difficult seasons, life is still full of meaning.
Letting Go of Perfection
One of the greatest barriers to memory-keeping is the belief that it must be done “right.” In truth, imperfect memory-keeping is often the most beautiful.
Missed days, messy handwriting, unfinished pages—they all tell the story of real life. The value lies not in how polished your keepsakes are, but in the love and intention behind them.
Preserving Today for Tomorrow
Winter passes quickly, even when it feels long. Children grow, routines change, and seasons shift. Memory-keeping allows us to gently hold onto what matters most without clinging too tightly.
By practicing intentional memory-keeping at home, you create a living record of your family’s winter life—one filled with warmth, comfort, and quiet joy.
You may not remember every detail years from now, but the feeling of these moments—the coziness, the love, the togetherness—will live on in the memories you chose to keep.
I know it is early, but it never hurts to start planning for some Christmas crafts to do with your children or grandchildren. Here are some cute ideas.
Small hands gripping scissors, eyes wide with excitement, glue smudges on their cheeks—these are the memories I love to make around the holidays. There's something special about turning ordinary supplies into keepsakes. Toilet paper rolls, often tossed out without a thought, take on new life as cheerful Christmas ornaments. They’re easy for kids to handle, gentle on your budget, and a gentle nod to being kind to the planet.
With these quick projects, kids feel proud seeing their creations sparkle on the tree. Moms can relax knowing the mess is minimal and the materials are safe. Every step is filled with laughter and a sense of accomplishment. Let’s turn the simple into something magical and fill your home with joy that starts at the kitchen table.
Why Toilet Paper Rolls Shine for Christmas Ornament Fun
Toilet paper rolls truly shine as the unsung heroes of Christmas ornament fun. These humble tubes bring color, cheer, and endless imagination to your kitchen table, all without breaking your budget. When holiday magic is found in the everyday, even the simplest materials can transform into treasures—especially when little hands are part of the process.
Toilet paper rolls make ornaments that don’t just dazzle, they also help the planet. By rerouting these tubes from the trash to the tree, I give my kids a hands-on lesson in kindness for Earth. Using recycled materials cuts down on waste, which means every ornament is a step toward cleaner holidays for everyone. According to the guide on eco-friendly fun with recyclables, simple acts like these help conserve resources and minimize our impact on the environment—one ornament at a time.
We teach our kids that wonder can begin with what’s already in our home, not just what’s bought from a store. Each ornament becomes a small symbol of sustainable holiday cheer.
Budget-Friendly Holiday Joy
Homemade Christmas ornaments shouldn’t empty your wallet. Toilet paper rolls are free and always on hand. No need for expensive supplies when cardboard tubes are perfect for snowmen, reindeer, or glittery stars. The beauty of this? You reduce costs but not the fun.
If you want more proof that making Christmas memories doesn’t need a big budget, check out these cheap Christmas crafts for kids. Even simple items can be turned into sparkling keepsakes with a little tape and a lot of imagination.
Here’s why moms (and kids) love using toilet paper rolls:
No extra cost—they’re already in every home.
No trips to the craft store on busy holiday weekends.
No guilt over pricey ornaments that might get broken.
Creativity Unleashed with Every Tube
With toilet paper rolls, there’s no wrong way to start. The blank cardboard becomes snowmen with felt scarves, silly elves with painted hats, or glitter-covered shooting stars. Kids can cut, color, paint, or sticker them any way they dream. If the result looks a little crooked or lopsided? That just adds to the charm.
To help kids put their creative stamp on Christmas, I like to keep these supplies on hand:
Crayons or washable markers
Non-toxic paint
Scraps of ribbon, fabric, or felt
Yarn, stickers, and plenty of glue
This open-ended freedom sparks ideas and builds confidence. Every roll gives kids a canvas, and every finished decoration is a point of pride. For parents worried about recycled materials, rest easy—these projects bring smiles, not stress. According to this resource on creative projects using recycled materials, using old items for new memories helps your family form traditions that matter.
Toilet paper rolls aren’t just recycled—they’re revived, reimagined, and ready for tree-trimming joy.
Quick Tips: Getting Ready for Ornament-Making With Kids
Spread out the newspaper, roll up your sleeves, and get ready for giggles! Prepping for a Christmas ornament session with kids sets the mood for fun and keeps things stress-free. A little planning helps everyone—toddlers, grade-schoolers, or big kids—take part safely and with big smiles.
Before inviting tiny helpers to the table, gather everything you’ll need. This keeps little hands from wandering through drawers or scurrying off mid-project.
Toilet paper rolls (clean and dry)
Washable markers or crayons
Non-toxic paints
Safety scissors (rounded tips for toddlers)
White glue or glue sticks
Yarn, ribbons, or string
Googly eyes, buttons, pom-poms
Newspapers or old sheets for the table
Having materials ready keeps the excitement high and the waiting to a minimum. If you want more helpful hints on choosing age-friendly supplies and prepping, these arts and crafts tips for families will help you start out strong.
Prepping the Toilet Paper Rolls
Give each roll a quick check. Make sure they’re sturdy and free of leftover tissue. For younger kids, cut the tubes ahead into smaller rings or shapes, so their focus can stay on the fun of decorating.
Flatten rolls gently to make painting easier.
Use adult scissors for tricky cuts or notches.
Consider pre-cutting string holes if you’ll be hanging the finished ornaments.
If your child is older and ready for careful scissor use, let them cut their own shapes (with supervision). For toddlers, it’s safest for parents to handle all cutting tasks in advance.
Taming the Mess Before It Starts
Let’s be real: glue, paint, and paper bits love to travel. Keep the chaos in check by setting up a dedicated workspace.
Cover the table with newspaper, a washable mat, or an old bedsheet.
Keep damp cloths or baby wipes nearby for quick cleanups.
Use shallow bins or trays to corral supplies.
Expect a little mess—it means the fun is real! If you’d like more tips on simple mess management, you’ll find plenty of creative ideas in this guide on mess-free crafts for kids.
Safety First for Every Age
Safety makes everyone happier, especially curious toddlers. Some quick pointers:
Always supervise kids, even older ones.
Skip small decorations with little ones under three to avoid choking hazards.
Use non-toxic, washable materials and safe, rounded scissors.
Store sharp or strong adhesives out of reach.
You can find more details about age-appropriate choices and best practices for safe DIY time in this post on art and craft safety for children.
Inviting Kids to Create Together
Set the project’s pace so everyone has time to enjoy each step. Give each child plenty of space and their own set of supplies to minimize arguments. Let mistakes become part of the design—quirks are what make these ornaments keepsakes you'll treasure for years.
A well-set table turns a simple afternoon into an easy, memorable family tradition.
Star and Snowflake Ornaments: Classic Shapes Made Simple
Homemade ornaments fill the tree with memories, and there’s no shape more beloved at Christmas than the star or the sparkling snowflake. These shapes help little hands practice cutting and folding, while leaving plenty of room to decorate big. You don’t need fancy tools—just a pile of toilet paper rolls, some creative supplies, and a little patience as glue dries and colors mix. Let’s turn simple tubes into joyful snowflakes and stars that shine and shimmer from your tree.
How to Make Easy Toilet Paper Roll Snowflakes: Walk through simple snowflake shapes for small hands. Suggest ways to decorate with paint, glitter, or sequins.
Snowflakes are a favorite for toddlers and younger kids. Each one turns out unique and can be as simple or detailed as you want. Here’s my favorite process for making snowflakes from toilet paper rolls:
Flatten the tube and cut it into rings, about half an inch wide.
For a classic snowflake, use 6 rings. Pinch them into points so each section looks like a flower petal or teardrop.
Arrange the rings in a round shape, then glue where each side touches—hold for a few seconds so it sticks well.
Layer extra rings or smaller pieces for more “branches” if kids want a fancier snowflake.
Painting snowflakes white or silver before glueing makes them shiny and bright. Once they dry, decorating is the real fun:
Squeeze school glue along the edges and sprinkle with glitter for a frosted look.
Dab on sequins or tiny pom-poms as if they’re snow crystals.
Paint with blues, purples, or gold for a pop of color.
Kids can also add popsicle sticks for extra structure or fun shapes, as shown in some tutorials like these toilet paper roll snowflake ornaments. Glitter or ribbon makes them shimmer under holiday lights. Finish each snowflake by threading a loop of yarn or ribbon through one of the holes—now it’s ready to hang.
Folded Star Ornaments for Sparkle and Shine: Show the process of creating and assembling the star shape. Suggest finishing touches: colorful ties, raffia, buttons, or bells.
When making stars, I love folding and layering toilet paper roll pieces to create a dimensional effect. Kids love to see flat cardboard transform into something that pops out from the tree. Here’s a simple step-by-step for making classic five-point stars:
Start with a clean tube and flatten it. Cut the tube into rings, then cut each ring open so you get five strips.
Fold each strip in half (so the bend is crisp), then pinch the ends to make the star’s arms.
Lay out the five folded strips in a star shape, with the pointed ends meeting in the center.
Use a glue gun (adults should help!) or tacky glue to secure where the arms overlap.
Once the star dries, let the fun part begin:
Paint the star bright yellow, metallic silver, or in a rainbow of shades.
Add sparkle with glue and chunky glitter on the tips.
Tie on raffia, colorful baker’s twine, or yarn for hanging.
Hot glue on a button, bead, or jingle bell right in the middle.
For more inspiration, the idea of combining different materials, like folded fabric stars, can spark new ways to use ribbon, felt, or even scraps from old clothes. Every star ornament becomes a memory, sparkling with personality and a sense of pride each time you look at your Christmas tree.
Animal and Character Ornaments: Reindeer, Angels, and More
Turning a humble toilet paper roll into a character that brings smiles is like sprinkling a little extra holiday joy around the house. Animal shapes and classic Christmas figures let your kids give each ornament a face, a silly style, or just a dash of sparkle that’s all their own. Whether you’re aiming for reindeer with wobbly antlers, angels with shiny wings, or Santas with big white beards, these ideas use simple supplies and a lot of imagination.
Bringing Rudolph and his friends to the tree is easier than you might think. Start with a painted toilet paper roll—brown is classic, but your child might want rainbow reindeer or even a blue one. Once dry, set out the extras:
Glue on googly eyes or draw big friendly eyes with a marker.
Stick a red pom-pom or bead for the nose—Rudolph needs his signature shine!
Cut short twigs or twist brown pipe cleaners for antlers and glue them to the top or sides.
Add a smile or a silly tongue for extra expression.
Get creative with poses! Use pipe cleaners as legs to make your reindeer stand. Lay your roll flat and glue felt hooves underneath if you’d rather hang it on the tree. For even more character, let kids glue on a bow tie or scarf from tiny scrap fabric.
Kids can find adorable inspiration and templates for reindeer ornaments in this guide to toilet paper roll reindeer crafts. Mixing and matching supplies turns every reindeer into a unique member of your own North Pole herd.
Making Toilet Paper Roll Angels and Santas
Toilet paper rolls become magical when you turn them into angels or Santas. For angels, paint the roll white, cream, or pale yellow. Once the base is dry, show kids how to use simple materials for the details:
Cut big wings out of white or gold paper and glue on the back.
Draw a sweet face with a rosy nose and cheeks.
Wrap shiny tinsel or metallic pipe cleaner for a halo.
Dress the angel in a skirt made from doilies, tissue, or even cupcake liners.
Santas are just as easy and fun. Paint the roll in red for his suit, leave a strip plain for the face, and add a black belt with a buckle using marker or a paper strip. Ideas to finish Santa:
Glue on a cotton ball or white yarn for the beard.
Make a cone-shaped hat from red paper and glue on a bit of cotton at the tip.
Draw or glue eyes, and add pink for chubby cheeks.
Use a scrap of felt for Santa’s mittens or boots.
Explore more ideas with this handy tutorial for a paper roll angel that breaks down each step for a keepsake you'll love to hang. With every character you make, kids can tell a Christmas story through their ornaments—each roll becomes a tiny friend to celebrate the season.
Let your kids dream up extras, like elves with pointy hats and ears or even a snowman family with scarves and top hats. The simpler you keep the supplies, the bigger their imagination can grow.
Creative Touches: Turning Ornaments Into Keepsakes
A simple cardboard tube, when decorated by tiny hands, becomes much more than an ornament. It turns into a story, a memory, or even a little treasure. The real beauty of homemade Christmas ornaments is how easy they are to make unique for every child and every year. I always encourage adding personal details, using old craft bits, or even bringing in unexpected materials from around the home. These creative touches transform a fun afternoon into a bundle of keepsakes you’ll love uncovering each December.
Kids light up seeing their name, the year, or their initials on an ornament. It gives every decoration a personal touch no store-bought option can match. Try these simple ideas for writing on ornaments:
Use permanent markers or metallic paint pens to add names or dates.
Cut glittery letters from sticky foam sheets for initials that sparkle.
Write a short holiday message, like “Merry Christmas 2024,” along the edge.
Markers in gold, silver, or red really pop against painted cardboard. For more inspiration, browse creative ways to personalize homemade ornaments and see what catches your eye on this board of personalized Christmas ornament ideas.
Handprints, Self-Portraits, and Photos
Little hands grow fast, but a painted handprint or traced shape helps remember just how small they once were. Here are my favorite ways to preserve those moments:
Coat a palm in white paint and press onto a painted ornament for a snowman “handprint.”
Draw faces, add real yarn hair, or let your child make a mini self-portrait on each roll.
Print wallet-sized family photos and glue them to the finished ornament, bordered by glitter or ribbon.
Each year, these keepsakes show a timeline of growing kids and changing styles.
Using Leftover Craft Supplies and Found Materials
Turning leftovers into magic is part of the fun. I never throw out tiny scraps, old buttons, or random bits of ribbon—they all find their way onto a new ornament at some point. Some ways to stretch your supplies:
Glue mismatched buttons for eyes, noses, or snowflake centers.
Use leftover ribbon or yarn for hanging loops or decorative bows.
Mix torn scraps of wrapping paper into festive collages.
According to this guide on upcycled Christmas craft ideas, buttons, fabric remnants, and even tags from gifts can spark new creations. Using what’s at hand teaches kids about reusing and makes every ornament that much more meaningful.
Bringing Nature and Everyday Finds Into the Fun
Sometimes the best materials come from a walk outside or a search through kitchen drawers. Natural objects and forgotten bits can bring an earthy, whimsical feel to any project. Consider these easy touches:
Tiny pinecones, acorns, or twigs glued to the top for hats, arms, or antlers.
Small pieces of twine as scarves or belts.
Shells, sticks, or even painted pasta shapes for extra interest.
The best ornaments capture your child’s mood, favorite color, or even a silly joke from the season. Let siblings each choose their own style or assign a “theme” for the year—animals, superheroes, family trip memories, anything goes. Mix and match supplies, snap a photo of each creation, and write down your child’s explanation in a holiday journal. When you decorate the tree together in future years, you’ll each have a bundle of keepsakes that tell stories, not just fill branches.
Conclusion
Every toilet paper roll ornament holds the fingerprints and laughter of your child, a little reminder that joy can bloom from the simplest things. These homemade treasures bring back the feeling of small hands at work, a table sprinkled with glitter, and the sound of shared stories. With each star, snowflake, or reindeer, you’re not just decorating a tree—you’re building a collection of memories, year after year.
Let this be more than a project. Savor the mess, the crooked smiles, and the quiet moments with your kids. Invite everyone to add their own flair and look forward to pulling out these keepsakes every December. Thank you for making time to create with love. If you have a favorite ornament or a new idea, share it—your story might inspire another mom to make magic from a simple cardboard tube.