Showing posts with label Seasons. Show all posts

Late Summer Porch Decor Ideas for a Cozy Transition


Late Summer Porch Ideas for a Cozy, Easy Transition


Late summer has a soft, tired glow. The evenings are still warm, but the light changes, the shadows stretch, and your porch starts to ask for a little more comfort. This is the perfect time to experiment with late summer porch decor to ease into the new season.

A good porch feels like a second living room, and the nicest front porch ideas are simple ones. Focus on layers of sun faded summer pieces, richer texture, darker tones, and a relaxed look that feels easy to live with. By refreshing your space with these elements, you can create a welcoming atmosphere that enhances your home curb appeal. Start with color, because it sets the whole mood.

Key Takeaways

  • Embrace a Grounded Palette: Use sun-faded neutrals like mushroom, sand, and cream as a base, then layer in deeper, earthy accents such as olive, clay, and navy to signal the transition to fall.
  • Prioritize Texture: Mix soft, performance-fabric textiles with natural materials like rattan, wicker, and aged wood to create a space that feels lived-in rather than staged.
  • Focus on Functional Layouts: Arrange furniture to encourage conversation and ensure walkways remain clear, using small, versatile pieces like garden stools or storage benches to maximize comfort.
  • Enhance Atmosphere with Lighting: Use warm-toned bulbs, lanterns, and string lights to soften the porch at dusk, creating an inviting glow that extends your outdoor enjoyment as evenings grow cooler.

Start with a cozy late summer color palette that feels calm, not crowded

A late summer porch should feel warm and settled, not loud. This is the moment for earthy colors, soft neutrals, and a few richer accents that hint at the transition toward early fall without making August feel over. When choosing your porch decor, focus on palettes that feel grounded rather than distracting.

In 2026, many front porch ideas are leaning toward the Slow Living Palette, with olive, clay, mushroom, dusty blue, sage, and sandy neutrals. That mix works well on a porch because it feels natural in heat, shade, and evening light. It also hides dust, pollen, and shoe marks better than bright white or candy colors.

Use sun-faded neutrals as your base

Start with the shades that look as if the sun softened them over time. Beige, sand, cream, mushroom, and warm gray give the porch a quiet backdrop. They keep the space airy, and they let wood, greenery, and darker accents stand out.

Use those colors on the largest pieces first. A neutral outdoor rug, cream seat cushions, or warm gray planters create a calm base without flattening the space. If your porch already has red brick, black railings, or stained wood floors, these lighter tones help balance the weight of those darker surfaces.

Mushroom is especially useful right now because it sits between gray and brown. It feels gentler than cool gray, but it still reads clean. On a porch, that matters. Late summer light is softer than June light, so cool shades can start to feel a little dull.

Add deeper accents for a richer late summer look

Once the base feels light, add color in small doses. Olive, rust, navy, brown, deep green, and clay all work well for late summer because they look grounded, not heavy. You do not need all of them. Two accent colors are plenty, especially on a small front porch.

Try olive pillows with a clay planter, or navy cushions with a rust throw. Dusty blue also fits the 2026 mood, especially if your porch gets a lot of sun and you want something cooler than brown. These deeper tones are practical, too, as they hide the grime that settles on outdoor fabric in late August.

Keep the darker colors at eye level and below near your front door. Pillows, a small stool, lanterns, and seasonal decor planters are enough. If every object is shouting for attention, the porch loses its calm. For a few real-world examples of that soft seasonal shift, this late summer front porch inspiration shows how simple color changes can carry the whole look.


Layer textures to make the porch feel warm and lived-in

Color gets your attention first, but texture is what makes a porch feel worth sitting in. A flat porch, all one finish and one surface, feels more like a hallway than a room.

Late summer is also a season of contrast. The air can still be sticky, the afternoons bright, and the evenings gentle. Because of that, a porch looks better when it mixes smooth and rough, soft and sturdy, old-looking and clean-lined as you begin your transition to fall.

Soften your space with outdoor pillows, throws, and an outdoor rug

Hard surfaces need softening. A woven outdoor rug underfoot, a striped cushion, and one folded throw over the arm of a chair can change the whole mood. As the days grow shorter, consider adding cozy blankets to keep nearby for cooler late August evenings.

Stick with outdoor-safe fabrics. Late summer still brings humidity, dust, and surprise rain, so indoor linen and cotton usually do not age well outside. Performance fabrics that mimic linen give you the same relaxed look with less trouble. Sunbrella remains a strong choice in 2026 because solution-dyed acrylic holds color well and stands up to UV exposure, mildew, and daily use.

Pattern helps here, too. A faded stripe, small block print, or textured weave makes a porch feel more layered than solid fabric alone. Keep the pattern scale moderate. Large tropical prints can feel too loud once summer starts winding down.

An outdoor rug also pulls everything together. Look for a thicker woven style in polypropylene or recycled PET if you want a softer feel under bare feet. If you want more ideas for using blankets and pillows as the season shifts, these summer-to-fall decor ideas show how small textile swaps can change a room or porch fast.

Mix natural materials for a relaxed, porch-friendly style

Texture also comes from the materials around the fabric. Wicker furniture, rattan details, wood side tables, braided baskets, ceramic planters, and a little dark metal create warmth without much effort.

This kind of mix feels better than a matching furniture set. A porch should look collected over time, not ordered in one click and dropped into place. Try a wicker chair next to a weathered wood table, or a ceramic pot beside metal lanterns. The contrast gives the space character.

Aged wood and unlacquered-looking metal are especially strong right now, along with HDPE outdoor furniture that mimics wicker but handles weather better. If you love the look of natural rattan, use it in covered areas and mix in sturdier outdoor pieces where the rain hits.

Leave some breathing room between materials. Too many baskets, too many planters, or too much woven texture can crowd a small porch. One or two pieces in each finish usually feels right.

Create a porch layout that invites people to sit and stay awhile

A cozy porch is not about how much you fit into it. It is about making the space easy to use.

That means the layout matters as much as the decor. If chairs face the street but not each other, conversation feels awkward. If the walkway is blocked, the porch turns into storage. Even a narrow front porch can feel inviting when your chosen outdoor furniture has a clear purpose.

Make a clear seating zone with just a few pieces

Start with one anchor. On a larger porch, that might be a small loveseat or a classic porch swing. On a modest stoop, a rocking chair or two simple chairs is enough to create a relaxing retreat.

Arrange the seats so they feel connected. A pair of chairs angled slightly inward feels more welcoming than two chairs lined up flat against the wall. If you have room, add a small round table between them. Round tables are popular in 2026 outdoor design because they soften hard lines and make compact seating areas feel less rigid.

Do not pack furniture edge to edge. A porch needs open space to breathe. Leave enough room to walk to your front entrance without weaving around a planter or clipping a chair leg.

Add small helpers that make the space more useful

The best porches have a few quiet workhorses. A side table holds a drink, keys, or a book. A basket keeps throws close by. A garden stool adds a surface and an extra seat when needed.

Storage benches are useful if your porch collects shoes, dog leashes, or watering cans. A narrow one can double as seating while keeping clutter out of sight. Meanwhile, a small ottoman can shift around the space as needed, which fits the 2026 move toward more flexible outdoor layouts.

Use helpers that match the scale of the porch. Oversized furniture can make even a pretty arrangement feel cramped. If you need visual ideas for how a small porch can transition into early fall without feeling stuffed, these porch transition examples on Pinterest are useful for seeing spacing, layering, and restraint.

Use lighting, plants, and small accents to finish the look

Once the furniture is set, the porch needs atmosphere. This is where the space starts to glow after dinner, when the heat breaks and the day slows down.

Good finishing touches do not compete with the main pieces. They support them. Light, greenery, and a few seasonal accents can make the porch feel complete without turning it into a theme display.

Pick warm lighting that makes the porch glow at night

Warm light changes everything. It softens hard corners, makes neutral colors look richer, and invites people to stay outside longer.

String lights work well across a ceiling or railing if the porch needs a gentle overhead glow. Placing lanterns on side tables adds light at eye level, while lanterns tucked into corners at floor level feel more intimate. Wall sconces near the front door help with both mood and function. If your steps get dark, motion-sensor lighting is worth adding for safety and convenience.

Use warm-white bulbs instead of cool blue light. Late summer decor already leans into earthy color and soft texture, so harsh light fights against that mood. Flameless candles inside glass hurricanes also help, especially if your porch catches wind.

Style plants and seasonal decor in a way that feels fresh

Potted plants are what keep a porch from feeling static. While your summer flowers and hanging baskets might be reaching the end of their peak, you can begin the transition to early fall by refreshing your containers. For height, designers in 2026 are still using Majesty Palms in large containers, but you can start mixing in dried hydrangeas for a more muted look.

Choose sturdy planters in clay, charcoal, or aged-looking ceramic. Those deeper finishes ground the softer greens around them. If your porch is small, one tall planter by the door and one lower pot near the steps often looks better than a cluster of tiny containers.

Your seasonal decor should stay subtle to start. Refresh the front door area with a new welcome mat and a simple fall wreath to signal the change of season. A bowl of shells or even a few faux pumpkins can act as a bridge between the seasons. You do not need to overwhelm the space, as this stage looks best when it still remembers summer. If you want a visual sense of how that progression can look over time, these early and late fall porch ideas show the shift clearly.

Frequently Asked Questions

Which fabrics work best for late summer porch decor?

Focus on performance fabrics, such as solution-dyed acrylics, which are designed to withstand humidity and UV rays while mimicking the look of linen or cotton. These materials are essential for late summer because they resist mildew and retain their color even as the season begins to shift.

How can I make a small porch feel cozy without overcrowding it?

Prioritize a clear seating zone with just a few pieces, such as two chairs angled inward with a small round table between them. By avoiding large, matching sets and keeping the floor space open, you create a functional, inviting retreat that doesn't feel cluttered.

What are the best colors to bridge the gap between summer and fall?

Look for the 2026 Slow Living Palette, which includes grounding tones like olive, clay, dusty blue, and mushroom. These colors feel natural in the soft late summer light and provide a seamless transition from bright summer shades to the richer tones of autumn.

A Porch You'll Use Every Day

A cozy porch does not need a full makeover. Better texture, warmer color, comfortable seating, and soft light can change the mood faster than a shopping spree.

The best update is usually the simplest one. Keep the base light, add a few richer accents, and choose pieces that feel good at sunset as much as they look good at noon. With the right porch decor, you can easily bridge the gap between summer and fall.

When your space feels personal, practical, and easy to live with, it becomes a true extension of your home rather than a space you simply pass through. Enhancing your outdoor living area in this way ensures that the comfort of your porch lasts long after the peak of summer has faded.

Old-Fashioned Summer Traditions Worth Bringing Back


Old-Fashioned Summer Traditions Worth Bringing Back


There’s something special about an old-fashioned summer. Long evenings on the porch, homemade lemonade sweating in mason jars, children running barefoot through the grass, and families gathering without screens competing for attention. In many ways, summer used to feel slower, simpler, and more meaningful.

Modern life moves quickly, but many people are longing for a return to cozy, memory-filled traditions that bring families and friends together. The good news is that these timeless summer traditions are still possible today — and often cost very little.

If you’ve been craving a gentler, more nostalgic season, here are some old-fashioned summer traditions worth bringing back into your home and family life.

1. Eating Dinner Outside

One of the simplest pleasures of summer used to be taking meals outdoors. Families gathered around picnic tables, under shady trees, or on porches to enjoy supper together while listening to birds and crickets.

You don’t need a fancy outdoor kitchen to recreate this tradition. Even a simple sandwich meal on the patio can feel special.

Ideas for outdoor summer dinners:

  • Use a checkered tablecloth and simple flowers from the yard

  • Serve watermelon, corn on the cob, and iced tea

  • Light candles or string lights in the evening

  • Turn off phones during the meal

  • Invite neighbors or extended family over occasionally

Outdoor meals naturally slow people down and create a relaxed atmosphere where conversation flows more easily.

2. Porch Sitting in the Evening

Before air conditioning and endless entertainment, people often spent summer evenings sitting on the porch. Neighbors waved as they walked by, grandparents shared stories, and children played outside until dusk.

Porch sitting may sound simple, but it creates space for rest and connection.

Ways to make porch sitting cozy:

  • Add rocking chairs or cushions

  • Keep a pitcher of cold lemonade nearby

  • Read aloud from a favorite book

  • Listen to old music softly in the background

  • Watch fireflies at sunset

Even if you don’t have a traditional porch, a balcony, patio, or front steps can work beautifully.

3. Homemade Ice Cream Nights

Homemade ice cream is one of those classic summer memories many people still treasure. Whether made with an old hand-crank freezer or a modern machine, the experience itself becomes part of the fun.

Children especially love helping measure ingredients, add toppings, and taste-test flavors.

Classic homemade ice cream ideas include:

  • Vanilla bean

  • Strawberry

  • Peach

  • Chocolate

  • Mint chocolate chip

Make it an event instead of just dessert. Spread blankets outside, play music, and enjoy the slower pace of a summer evening together.

4. Visiting the Local Library

Summer reading programs have been a beloved tradition for generations. A weekly library trip can become a meaningful rhythm that encourages imagination and learning without feeling like schoolwork.

Old-fashioned summers often included stacks of books beside the bed, afternoons spent reading under trees, and quiet moments away from technology.

Create your own summer reading tradition by:

  • Letting each family member choose books

  • Reading together in the evenings

  • Keeping a summer reading journal

  • Visiting used bookstores or library sales

  • Reading classic children’s stories aloud

Books and summer seem to belong together in the most comforting way.

5. Hanging Laundry Outside

There’s something deeply nostalgic about sheets blowing in a warm summer breeze. While dryers are convenient, hanging laundry outside occasionally can bring back a sense of peaceful homemaking.

Fresh air gives linens a clean scent that’s hard to duplicate.

This simple tradition also helps slow down everyday chores and connect us with the rhythms of the season.

Many people find ordinary household tasks more enjoyable when done intentionally and without rushing.

6. Backyard Games and Simple Fun


Old-fashioned summers didn’t rely on expensive entertainment. Children often spent hours creating their own fun outdoors.

Classic backyard activities still feel magical today:

  • Jump rope

  • Croquet

  • Hide-and-seek

  • Kickball

  • Water balloon tosses

  • Catching lightning bugs

  • Sidewalk chalk

  • Flying kites

Simple outdoor fun encourages creativity, movement, and family memories that often last longer than expensive outings.

Adults can join in too. Some of the sweetest family moments happen when everyone laughs together outside.

7. Sunday Drives Through the Countryside

A leisurely Sunday drive used to be a cherished family tradition. People piled into the car with no urgent destination, simply enjoying scenic roads, small towns, and quiet conversation.

This tradition still works beautifully today.

Ideas for an old-fashioned summer drive:

  • Stop for ice cream at a local stand

  • Visit a farm market

  • Explore small antique shops

  • Drive through rural back roads

  • Pack snacks and a picnic blanket

The goal isn’t productivity — it’s enjoying time together and appreciating simple beauty along the way.

8. Writing Letters and Postcards

Before texting and social media, summer often included handwritten postcards from vacations or letters sent to friends and relatives.

Receiving real mail still feels surprisingly meaningful today.

Consider reviving this tradition by:

  • Sending postcards during day trips

  • Writing encouragement letters to grandparents or friends

  • Letting children decorate envelopes

  • Keeping pretty stationery on hand

Small acts like this create connection in a way digital communication often cannot.

9. Preserving Summer Foods

Canning, freezing, and preserving summer produce used to be a normal part of the season. While not everyone wants to can vegetables for an entire winter, even small versions of this tradition can feel satisfying.

Simple ways to participate include:

  • Freezing fresh berries

  • Making homemade jam

  • Drying herbs

  • Baking fruit crisps

  • Preparing homemade pickles

Seasonal cooking helps people appreciate summer’s abundance and creates comforting routines in the kitchen.

10. Watching Summer Storms

Many people remember watching summer thunderstorms through the closed window while rain cooled the air and lightning flashed in the distance.  

Storm watching naturally invites stillness.

Instead of constantly rushing from activity to activity, pause and experience the beauty of summer weather.

Make it extra cozy with:

  • Soft blankets

  • Hot tea or coffee

  • Quiet music

  • Candlelight during the storm

Sometimes the most meaningful traditions are simply learning to notice the moment we’re in.

Why These Old-Fashioned Summer Traditions Still Matter

These nostalgic summer traditions may seem small, but they help create something many people deeply miss today: connection, rhythm, comfort, and togetherness.

Modern life often pushes us toward busyness, productivity, and constant entertainment. Old-fashioned summer traditions remind us that joy is often found in simple things:

  • Eating together

  • Talking on the porch

  • Reading books

  • Watching sunsets

  • Playing outside

  • Sharing homemade food

These slower moments become the memories people treasure most years later.

You don’t need to recreate an entire vintage lifestyle to enjoy an old-fashioned summer. Simply choose one or two traditions that sound meaningful to your family and begin there.

You may be surprised how quickly these small practices transform the feeling of your home and create a season filled with warmth, nostalgia, and lasting memories.

For more cozy home inspiration and nostalgic seasonal ideas, visit Today’s Home

Zero Waste Fall Decor: Fresh Ideas for a Cozy, Sustainable Season (2025 Guide)


Zero Waste Fall Decor: Fresh Ideas for a Cozy, Sustainable Season (2025 Guide)

Crisp leaves crunch beneath your boots as the cool air fills with the scent of spiced cider. Autumn’s glow settles in, painting the world in russet and gold. There's a simple joy in making a space feel inviting for the season, but it doesn't have to come at the planet’s expense. Zero waste fall decor gives you all the cozy charm—without the plastic or piles of trash.

This year, earthy colors like deep rust, olive, and charcoal have taken center stage, showing up everywhere from fabric napkins to repurposed vases. People are skipping plastic pumpkins in favor of foraged branches and dried wildflowers plucked right from the backyard. You see thrifted treasures and upcycled finds becoming the stars of seasonal tables, revealing that fall style can come from what you already have.

2025’s top trends highlight warm textures, organic shapes, and relaxed, lived-in looks. Even the smallest swaps—a wooden crate for a centerpiece, a bunch of acorns gathered from a stroll—bring nature indoors and cut down on waste. It’s about celebrating fall’s bounty, not cluttering your space with more throwaway stuff.

Get ready to discover simple swaps and fresh ideas. These tips will help you style a welcoming autumn home while treading lighter on the earth. The best part? Most you can start using today.

Why Choose Zero Waste for Your Fall Home

The thick scent of cinnamon and the glow of early-evening sun can make any fall room feel magical. But behind the beauty, mountains of plastic pumpkins and synthetic garlands end up in landfills or sneak into waterways each year. Choosing zero waste for your autumn decor is more than a look—it’s a chance to fill your home with warmth and a story, not just stuff. When you preserve what’s special about the season, you build space for real comfort that’s meant to last.

Protecting Nature One Decoration at a Time

Decoration from Nature

Most single-use party decor and artificial wreaths are made from plastic, foam, and dyes. They often break after just a season, then end up crowding trash bins or littering streams and forests. Oceans feel the effects, too—microplastics from synthetic decorations are found in shorelines and marine life.

Switching to zero waste habits means breaking this cycle. Imagine shelves lined with glass jars filled with dried orange slices, bowls of acorns and pinecones from the park, or a garland woven from real autumn leaves. Recycled and foraged materials add stories of walks outdoors and afternoons spent with hot cider.

Here’s how zero waste basics fit right at home in fall:

  • Reuse and rotate decorations each season, so nothing overstays its welcome or adds to landfill.
  • Compost plant-based decor scraps, like dried leaves or pumpkins, instead of tossing them.
  • Get creative with what you already have—transform last year’s baskets or jars with new touches.

Quick habit changes that stack up:

  • Use pressed autumn leaves in DIY art or as part of a natural centerpiece.
  • Save citrus peels or cinnamon sticks to dry for next season—these add scent and texture without plastic.
  • Shred or compost any wilted stems or leftover bits after the holidays.

Every reused and composted piece means less waste at the curb and more wild beauty inside your home. For deeper ideas, this guide to sustainable fall decorations has practical tips for keeping autumn festive and green.

Save Money and Add Personal Flair

Envision your living room sparkling with warmth—layered throw blankets from the thrift shop, a centerpiece you built out of foraged pinecones, and lanterns pieced together from old jelly jars. With zero waste, you create spaces where every item tells a part of your story. It’s a smart swap, too.

Fall is peak season for disposable decor, with US households tossing thousands of tons of plastic and synthetic items soon after. Meanwhile, a walk through your neighborhood, a stop at the thrift store, or a dig in your “already have that” box turns up treasures money can't buy at a big-box store.

A quick look at savings:

Decor TypeTypical Cost (Store-Bought)Cost to Make or Source Zero WasteFaux pumpkin centerpiece$20–$40$0 (foraged gourds or squashes)Synthetic garland$25–$50$0 (leaves, twine from home)Glass jar lanterns$15 each$0 (upcycled food jars)Velvet pillows$30+ each$5–$10 (thrifted or homemade)

This year’s fall decor trends for 2025 show people layering textures—think reclaimed wood, old knitwear turned into pillow covers, or thrifted brass candlesticks. These finds feel nostalgic, authentic, and deeply personal. Pinterest even reports vintage maximalism up 260 percent for fall as more people pick self-expression over mass-produced pieces.

You get more than a smaller bill—you add personal touches and emotional value. Friends remember the candlelight in your handmade lanterns, not a label. Each thrifted pillow or dried flower arrangement feels like a chapter of your story, not seasonal clutter.

For more inspiration on zero waste fall decor that blends beauty and savings, check out these ideas for reusing and repurposing.

Choosing zero waste lets your fall home grow richer with every memory, not every receipt.

Gather Eco-Friendly Materials for Lasting Decor

Step into a quiet afternoon that smells faintly of pine and rain. Imagine a walk in the woods or a thrift store sweep, where each find feels like a small story waiting to be told. Here is where zero waste decor begins—by gathering textures and treasures that invite the earthy calm seen in 2025’s trend toward warm neutrals and natural materials. You’ll meet rough wool, smooth glass, warm timber, and soft linen like old friends, all ready to shape your space for fall.

Forage and Use What Nature Provides

Let the season guide your hands as you gather. Fallen leaves, crisp and curled, lie scattered along the trail. Pinecones nestle against tree roots, while acorns collect in wet moss. Seed pods, dried grasses, and berry husks glow with autumn color. A simple linen sack or woven basket keeps these finds dry and fresh—avoid plastic to skip the extra waste.

Before displaying your foraged pieces, give them a quick brush to remove dirt. Storing them in breathable containers keeps them crisp and mold-free. Each foraged treasure means one less piece of packaging in the trash. Use pinecones stacked in a glass bowl for a rustic centerpiece or gather leaves and tie them with twine for an organic wall arrangement. Try weaving dried grasses onto a length of jute for a delicate garland.

For more tips on how to clean, store, and display natural materials, visit this guide to sustainable fall decorations.

Transform Everyday Items into Treasures

Look around your home for simple materials that can get a second life. Mason jars, washed and dried, take on a new look as candle holders placed along a window sill. Old cotton shirts can be cut and hemmed into table runners or cloth napkins (the faded checks and stripes add instant warmth to your table). Spare wood scraps—maybe from an old crate or shelving—work well painted or left natural for small signs that welcome guests.

You don’t need fancy tools. Rely on hot glue, a sewing needle, or sandpaper. Stick to color palettes anchored in cinnamon browns, soft creams, and harvest gold. Citrus peels, whole cloves, or twigs from the yard bring nostalgic scents and texture to any upcycled piece. These approachable projects show that even those new to DIY can start with what’s on hand and a little imagination. Detailed tutorials for these easy upcycles can be found at DIY Fall Decor: Upcycling Thrift Store Finds.

Hunt for Secondhand Gems

Picture running your fingers across a heavy brass tray or thumbing through a pile of wool throws at the local flea market. Baskets made from twisted willow and vintage glassware in jewel tones—deep emerald, amber, garnet—catch the light and tell stories of past autumns. Choose lasting materials: handmade pottery, wood bowls, glass, and metal objects that will stand the test of time rather than fall apart after one season.

Seek out the textures and shapes that speak to cozy evenings—thick-knit fabrics, reclaimed wood frames, or handwoven baskets. Vintage glass is a stand-out for 2025, especially pieces in moody colors that echo the season’s grounded neutrals. Blend these finds with foraged nature for a rich, layered look that no store display can match. For inspiration on finding and styling secondhand pieces, explore Sustainable Fall Decor Ideas.

By mixing the bounty of the outdoors, small home upcycles, and secondhand treasures, you create autumn decor that feels inviting, wise, and completely waste-free.

Simple DIY Projects to Warm Your Spaces

Nothing says autumn like making a few meaningful updates in your favorite nooks, especially when you can feel good about every detail. With a few gathered materials and time for your hands to remember old skills, you can quickly add comfort and color without bringing home more waste. These projects are all about the genuine pleasure of making something by hand—carefully, slowly, with the intent to welcome not just guests but also the season itself.

Craft a Foraged Wreath for Your Door

Foraged Wreath

Step out into the brisk air and look for bendable vines near the hedge, wild berries along the trail, or sprays of dried grasses swaying on the roadside. Form your finds into a loose circle, letting the curve of each branch guide your hands. Tuck in poppies or rosehips for color, then use twine or thin wire to hold everything steady.

To add a personal touch, tear strips from old linen shirts or a faded silk scarf for ribbons. The fabric's worn edge and soft weight bring a subtle, lived-in charm that feels both intentional and homey. When your wreath sways on the door, each breeze seems to wake its natural scent and color—a quiet hello to anyone who visits.

Experiment with:

  • Acorns tucked by the bow for earthy contrast
  • Ribbons in deep green or warm ochre made from old clothes
  • Soft layers of dried herbs (like rosemary or lavender) for a rustic look and faint scent

Get more detailed step-by-steps for natural wreaths at this foraged fall wreath guide.

Make Centerpieces from Recycled Vessels

Imagine a thrifted bowl taking center stage on your kitchen table, filled with walnuts and unshelled pecans that catch candlelight. Find a vessel—vintage glass, chipped pottery, even a sturdy soup bowl will do. Arrange small pillar candles in the middle, nestled among whole nuts, tiny gourds, or dried fruit slices.

To give your centerpiece extra texture, dab a little glue along the rim and press on moss you gathered or pull from a bare patch in the yard. If you want a moodier color, brush a thin layer of terracotta paint over the bowl’s outside—let a bit of the old pattern peek through for a layered effect. These details add unexpected warmth, and each bowl quietly shares its second-chance story at every meal.

Tips for a standout recycled centerpiece:

  • Use soy tealight candles for a soft fall glow
  • Paint only part of the vessel for a dipped-color look
  • Fill gaps with tiny pinecones, dried beans, or sliced citrus

Check out these sustainable fall decor ideas for more ways to use recycled homewares in your tablescapes.

Sew or Tie Cozy Textile Accents

The quickest way to change a room’s mood for fall is to refresh your soft goods. Have a scarf that’s gone out of style but feels too nice to discard? Fold it and tie the corners around a throw pillow—no sewing needed. The deep moss green or cable-knit texture brings a woodland feel straight to your sofa.

If you like fabric projects, cut old flannel shirts into squares and stitch (or even glue) them into pillow covers or placemats. For anyone short on time, tie fabric strips together to create a simple knotted garland—layer these over your mantel or drape across a table’s edge. Hunt for cloth printed with animal motifs like foxes, owls, or geese at secondhand shops to keep the look playful and personal while staying waste-free.

Ways to style new textile accents:

  • Layer different greens and siennas for depth
  • Use knotted scarves as pillow wraps—no sewing required
  • Add a few animal-printed pieces for woodland warmth

Simple changes with fabric can change the atmosphere and remind everyone of the snug comfort fall brings. For even more upcycled inspiration, browse this zero waste fall decor roundup.

Style Your Home for Cozy, Waste-Free Fall

Zero waste doesn’t mean giving up warmth or beauty. Fall’s quiet magic comes alive when you layer natural textures and let earthy hues mingle in every corner. With simple, thoughtful touches, you can build a space that feels full, personal, and kind to the earth. Now is the time to pull together all the treasures you’ve gathered—think chunky knits, upcycled jars, and the soft metallic sheen of heirloom trays. Picture the glow of beeswax candles flickering on a cool night, casting gentle light on the stories held in each piece. Welcome to a home that’s cozy, inviting, and waste-free.

Layer Colors and Textures Thoughtfully: Paint Rooms Alive with Chocolate Browns and Linen Folds

Let every surface tell a story through layers. Grab those worn linen throws and softly rumpled blankets you've collected—their frayed edges and cozy weight make a room feel hugged from the inside. Fold one over the edge of a reading chair for a hint of chocolate brown or cinnamon. Even a single thrifted plaid, tossed over the arm of a sofa, invites guests to settle in as the wind picks up outside.

Instead of aiming for “new” with every season, focus on arrangement harmony. Start small:

  • Drape a throw across the foot of a guest bed.
  • Stack pillows in harvest colors, like burnt orange or olive, on a bench or window seat.
  • Mix chunky knits with fine weaves—their clash of textures adds depth without clutter.

Place tarnished metals or vintage trays on tables to catch the last daylight. Their gentle shine works with raw woods and linen folds for a look both lived-in and elegant. Only rearrange instead of adding more. A thoughtfully styled mantel, finished with a few candlesticks, shines brighter than a crowded shelf. For more visual inspiration and real-life examples, browse these minimalist fall decorating ideas.

Create Focal Points with Personal Touches: Guide Setting Up Shelves with Mixed DIY Items and Photos for a Story-Rich Display

Bring meaning to your fall styling by building small story corners. Shelves and mantels become gathering places for personal treasures—maybe a wood-framed family photo nestled between homemade leaf garlands or a favorite mug from a childhood trip. Layer in handmade crafts: a pumpkin-shaped sachet stitched from flannel scraps, a jar of pressed acorns, or a bowl filled with dried cinnamon sticks.

Keep the balance. Choose a few pieces to display so nothing gets lost. Set up focal points:

  • Place a small group of glass jars filled with foraged leaves and acorns on the mantel.
  • Prop photos against a stack of vintage books for easy visual flow.
  • Add a beeswax candle, cut and set in an old jam jar, for a glowy, golden warmth.

When night falls, these candles cast shadows that dance across wood and fabric. The light feels gentle and clean, and unlike paraffin candles, beeswax burns slow, filling your space with faint honey scent and no harsh fumes. Swap out harsh table lamps for clusters of candles and twinkle lights set in recycled lanterns or pie tins.

Let each shelf carry a memory—these small vignettes bring family close and invite laughter on chilly nights. Minimal, carefully chosen touches can turn even a simple bookcase into a fall centerpiece. If you want to explore more ways to tell your story with autumn style, these beautiful Fall 2025 decorating trends highlight the warmth, texture, and seasonal charm gaining ground this year.

Conclusion

Picture yourself with a warm mug in hand, soft lamplight flickering from a thrifted lantern and the afternoon quiet wrapping around you. This is what zero waste fall decor brings home: real comfort, honest beauty, and a quieter mind knowing less is headed for the trash.

Choosing to reuse and make your own decor isn't just about saving money or following trends. It's about slowing down and noticing the little things—a twist of cinnamon, a handful of acorns, or a faded scarf finding new life. You might be surprised how a few simple changes can make your space feel richer and more welcoming.

Start small. Try arranging a bowl of backyard finds or switching your usual throw for something secondhand. Share photos or ideas with friends, and celebrate each new detail you add. Every thoughtful corner tells your story and leaves room for more cozy nights to come.

Thanks for joining in on this year’s zero waste fall makeover. Try one project this week. Add your own touch, then invite others to see how simple, sustainable style can feel like home.

Cleaning and Decorating for Fall: Simple Ideas for a Cozy, Clutter-Free Home


Crisp mornings, golden leaves, and the gentle sweep of cool air—fall has a way of inviting us to slow down and settle in. As summer slips away, many feel the urge to refresh their homes with seasonal cleaning, clearing out the leftovers of a busy season to declutter and make space for warmth and comfort. The colors get richer, the light softens, and cozy fabrics call to be draped across couches and chairs.

Blending fall cleaning with fall decorating weaves together function and beauty. A clear space lets you enjoy autumn’s simple pleasures, like a mug of spiced cider or the glow of candlelight. This season, it's not just about what you add but how you care for what you already have. With a little effort, your home can reflect the calm and richness of fall, creating a welcoming space that’s both tidy and filled with seasonal style.

Let the Season In: Deep Cleaning for Fall

Fall brings a fresh mood to every corner of the house. As the leaves change and the light filters through clean windows differently, life slows just enough to settle in. To match this seasonal shift, it’s time for a thorough fall cleaning to let go of summer clutter and prep every room — from bedrooms to the living room — for the cozy months ahead. A deep clean now allows you to enjoy the warmth and comfort autumn promises, with indoor air quality improved and distractions cleared away.

A woman enjoys a cozy autumn day, holding a tea mug over an open book with a maple leaf. 

Dusting and Decluttering for a Fresh Start

A little dust can build up during the busy days of late summer, making dusting an essential part of fall cleaning. Reach those often-forgotten areas like light fixtures, ceiling fans, baseboards, window sills, frames, and clean windows themselves. Don’t forget the tops of cabinets and shelves where dust collects unnoticed.

Sweep away cobwebs from quiet corners and go room by room, clearing surfaces and sorting out what feels stale. Mementos, magazines, or summer knick-knacks that no longer spark joy can be donated or put away. Fresh surfaces create space for new fall touches.

For a complete cleaning checklist covering every detail, explore this thorough fall deep cleaning checklist.

Laundering and Swapping Seasonal Linens

Cooler nights call for heavier blankets and rich, textured throws. Swap out light summer sheets, and wash everything as you pull it from storage. Clean all bedding, pillows, and don’t forget to clean mattress covers, too. Launder curtains or dust blinds while you’re at it, and remember to clean dryer vents and washing machines for optimal home hygiene.

Here’s a quick guide for your fall linen swap:

TaskFrequencyWhy it Matters
Wash blankets/duvetsEvery seasonRemoves dust and allergens
Clean or swap curtainsEvery seasonFreshens air, resets the tone
Flip and vacuum mattresses / clean mattressEvery seasonMaintains comfort and hygiene
Clean dryer ventEvery seasonImproves dryer efficiency and safety
Clean washing machineEvery seasonPrevents mold and odors


Changing these basics sets a cozy feeling throughout your home and lays a fresh foundation for the months ahead. For more guidance, the American Cleaning Institute offers helpful fall cleaning tips for linens and more.

Freshening Up High-Traffic Areas

Entries and mudrooms see heavy use as folks come and go with muddy boots and leaf piles. Sweep, mop, and scrub these high-traffic spots regularly. Wipe down doors, banisters, and switch plates to keep entryways inviting. The kitchen especially benefits from a fall reset with thorough kitchen cleaning: clean behind and under appliances, clean the oven and refrigerator, clear out expired pantry items, degrease cabinet doors, scrub down cabinets, and clean the garbage disposal.

  • Mop hard floors in foyers and hallways
  • Wash all carpets and rugs, including mats
  • Empty and disinfect trash cans
  • Organize shoes, coats, and bags in the entryway for easy grab-and-go

Turning attention to these busy areas makes the whole home feel more welcoming and easier to maintain as colder, wetter weather settles in.

Storing Summer Gear and Prepping for Indoor Living

Before the first frost, gather all summer gear and seasonal items for storage:

  • Wash and store swimsuits, pool towels, and outdoor cushions
  • Clean and stack garden tools in the shed or garage
  • Donate or box up summer clothes in closets you won’t need until next year
  • Check and replace furnace filters to ensure clean indoor air quality

As outdoor living transitions inside, rearrange your living spaces to showcase snuggly blankets, baskets of books, and rows of candles. Making room for cozy evenings together now means you won’t have to hunt for cold-weather essentials when the chill arrives.

Feeling ready to embrace fall’s coziness starts with a deep clean and a clear space. By tackling this deep clean early, you’ll find it much easier to add autumnal touches in a home that already feels fresh and seasonally prepared.

A Thoughtful Approach to Decluttering Seasonal Decor

As fall peeks in through the window and the urge to decorate strikes, our storage bins filled with fall decor may feel just as full as our calendars. Setting aside time to mindfully declutter each box of pumpkins, leaf garlands, and cozy pillows can transform your space. Taking this gentle, intentional approach sets the stage for a home that feels open, not crowded. Focus less on how much you display and more on what feels right for your home right now.

Ask What Sparks Joy—Then Let Go

Imagine opening a tote and being greeted only by pieces you truly love. Hold each decoration in your hands and ask yourself if it still makes you smile. If it feels tired or out of place, thank it for past seasons and let it go.

  • Keep: Items with sentimental value, strong memories, or that match your autumn style
  • Pass Along: Gently used decor can often find a new life at shelters, community centers, or through donation
  • Recycle or discard: Broken or overly worn-out items

As you review your seasonal decor, remember that simple touches can be just as festive as a crowded display. You’re making space for special moments, not just more stuff.

Sort and Store for Simplicity

Having a system for your seasonal decor means less stress each year. Sort decor by type: pumpkins together, faux leaves with other botanicals, and so on. Use sturdy totes or clear bins so you can see what’s inside at a glance.

Here’s a smart way to organize:

CategoryWhere to StoreTips for Easy Access
LinensLabeled fabric binsStore with other fall textiles
Fragile DecorBubble-wrapped in stackable binsKeep on a top shelf
WreathsHang in closets or garagesUse hooks or garment racks

For more ideas, see this helpful guide to storing fall decor.

Keep What’s Useful and Versatile

It’s tempting to collect decor for every possible theme. Instead, choose seasonal decor pieces that work across multiple years and in different rooms. Think about what can mix in with winter or Thanksgiving accents, or transition to a year-round vignette with small adjustments.

Some quick guidelines to avoid clutter:

  • Neutral-colored pumpkins blend with almost any setting
  • Wool throws or plaid pillows can last through January
  • Candleholders and lanterns suit every season with a change of candles or greenery

By focusing on items that pull double duty, you keep your home feeling fresh and not overdone. For a full decluttering checklist and creative organization system, explore this proven seasonal decluttering method.

AI Generated 

Choosing only the pieces that bring warmth and meaning helps your home breathe. Instead of digging through a maze of extra stuff, you’ll easily find what matters most every fall.

Layer in Texture and Warmth Indoors

When the air turns crisp and daylight fades earlier, your home becomes a shelter from the chill. Creating true comfort is less about adding seasonal decorations and more about subtle changes in texture, color, and natural elements. This time of year invites you to layer—not just your wardrobe, but your living space. Rich fabrics, cozy accents, and natural touches combine to make every room, especially your living room, feel more inviting.

Swap Out Everyday Essentials

Refreshing your space starts with the basics. Replace lightweight, airy summer linens and towels with thicker, softer options in deeper, warmer hues. This simple fabric swap transforms the atmosphere almost instantly.

  • Try these effortless textile swaps:
    • Swap cotton throws for chunky knit blankets or faux fur
    • Layer velvet or flannel pillow covers, even just a few on your sofa
    • Trade sheer curtains for heavier drapes in shades like burgundy, rust, or forest green
    • Add a thicker area rug or place a small runner beside your bed

Bringing in heavier, richly colored fabrics creates a cozy ambiance that lighter, summer-weight materials can’t offer. You don’t need to change every room—just a few intentional updates will make your living spaces feel snug and ready for relaxing. Adding inviting scents such as cinnamon or spiced apple candles can also help welcome the cooler months through fragrance. For more inspiration, explore these practical home decor swaps.

Add Nature’s Touches

Flat lay of eco-friendly gift wrapping using natural materials, leaves, and fabric.
Photo by Anastasia Shuraeva

Bringing the outdoors inside connects your living environment with the changing world beyond your walls. Nature offers beautiful, free decorations—just bring a basket and a bit of curiosity on your next walk.

  • Easy ways to decorate with natural elements:
    • Fill vases with colorful branches or dried grasses
    • Layer pinecones, acorns, or river stones in a wooden bowl
    • Scatter pressed leaves across a tabletop or mantle
    • Arrange a bundle of twigs in a narrow jug for a rustic accent

These straightforward additions add freshness and movement without feeling overdone. Mixing natural colors, shapes, and heights gives any surface a relaxed, organic feel. You don’t have to spend extra to invite warmth and charm; often the best touches are just steps from your front door. For more ideas on incorporating nature into your interiors, see these nature-inspired decorating tips.

Layering textures, swapping essentials, and bringing nature indoors will soften your rooms and invite everyone in—making each corner of your home a little richer and cozier this time of year.

Make an Impression Outside: Fall Decor for Porches and Entryways

The welcome truly begins at the front door. Autumn sets the perfect backdrop for inviting touches—warm hues, layered textures, and statement pieces that capture the season’s best. After clearing away summer clutter, even a small porch transforms into a stage that greets guests with fall’s effortless charm. With a thoughtful mix of natural finds and durable, reusable accents, you create an entryway look that feels both humble and full of heart.

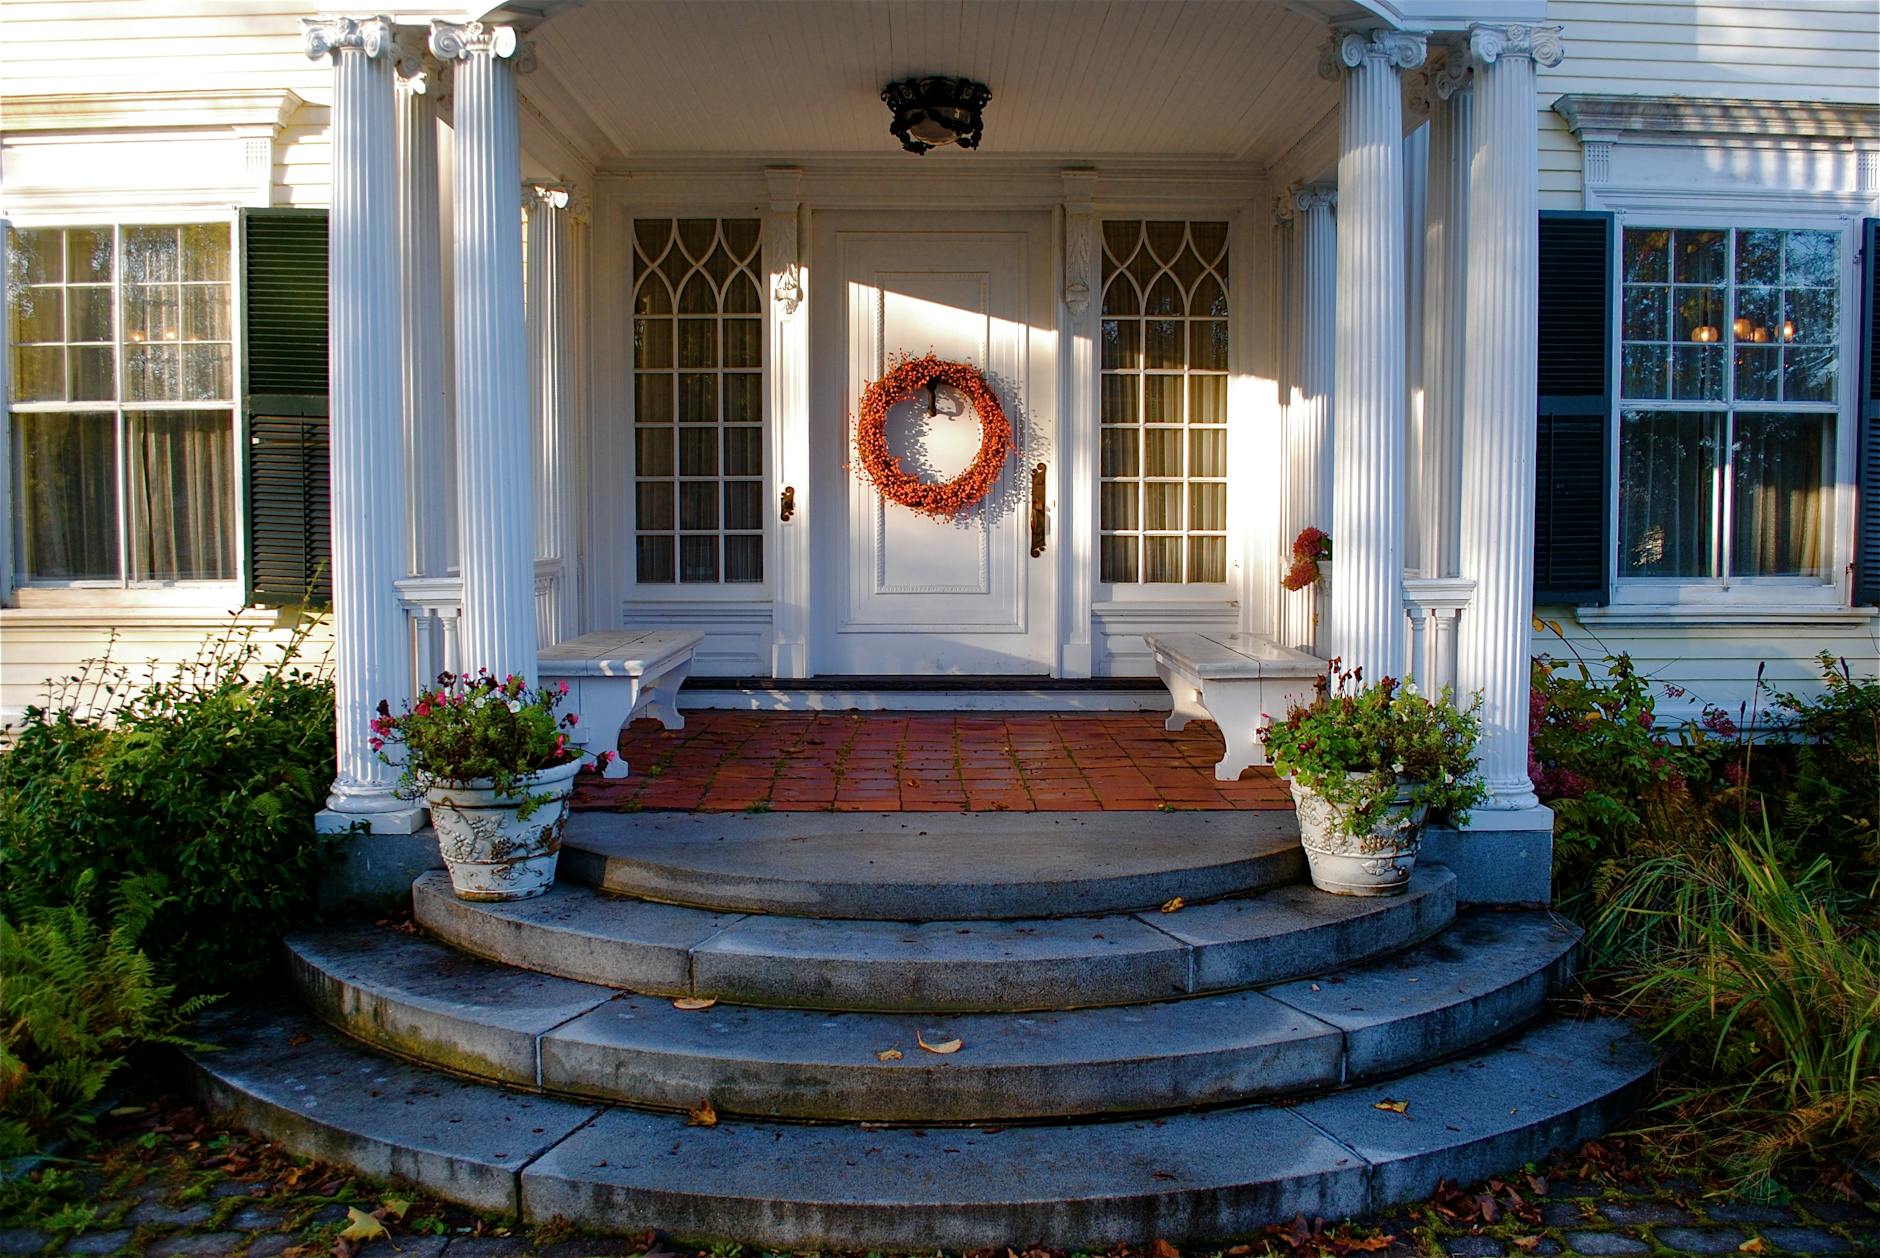
Charming entrance porch with white pillars, autumn wreath, and curved stone steps in Bath, Maine. 

Photo by Matt Barnard

Curb Appeal with Seasonal Style: Expert Tips for Fall Decorating Outdoors

When it comes to outdoor fall decorating, less often means more. Sometimes the simplest accents—a crisp new doormat, a splash of orange from hardy mums, or a single oversized pumpkin—make a bigger impact than a crowded display. Focusing on a well-curated vignette at your entryway sets a warm, uncluttered tone that welcomes guests and uplifts your home's exterior.

Starter tips for tasteful autumn curb appeal:

  • Layer rugs for depth: Place a durable outdoor rug beneath a smaller patterned doormat to add instant texture.
  • Anchor with one or two statement pumpkins: Oversized or uniquely shaped pumpkins attract the eye and infuse color without overwhelming the space.
  • Add height with potted plants: Tall, full-bloom mums or thoughtfully arranged faux branches in planters draw the gaze upward and beautifully frame your doorway.
  • Mix real and faux: Pair fresh pumpkins and natural greenery with weatherproof artificial wreaths or garlands to maintain a crisp look through chilly nights.
  • Update wreaths and mats: Refresh your autumn wreaths—whether made of twigs, faux leaves, or mini gourds—and pair them with a seasonal doormat that says “hello fall” for an inviting entryway.
  • Keep it open: Leave breathing room between each element so the eye can appreciate each detail. A clutter-free stoop highlights every special touch.

With just a few intentional changes, your entryway becomes more than a passage—it transforms into a seasonal welcome. For more inspiration on creating a welcoming porch with simple, elegant fall decor, explore these charming fall porch decor tips.

Fall decorating isn’t about covering every inch with ornaments but about selecting a few meaningful pieces. When your outdoor entryway feels purposeful and uncluttered, guests—and you—start to feel at home long before stepping inside. For even more ideas and visuals, check out these fall front porch decorating ideas that show how both subtle and bold inspiration can brighten any space.

Refresh Without Overspending: Repurpose and Revamp

Prepping your home for fall doesn't mean starting from scratch or blowing your budget. There’s a quiet joy in working with what you have, using creativity to find hidden treasures in every room and closet. With some imagination, old favorites and even everyday basics can feel fresh, festive, and completely new. Fall is the perfect season to rethink, restyle, and give a second life to trusted pieces.

Shop Your Home for a New Look

You don’t need to fill a trunk with new decor to feel the season indoors. Instead, treat your house like a little boutique. Take a walk through each room with a fresh eye. Notice objects or fabrics you’ve stopped seeing—a woven basket, a wooden tray, those candlesticks in the back of the cupboard. Rearranging these items or using them in different ways brings instant change.

Small moves make a big difference:

  • Move a cozy throw from the guest room onto your living room couch.
  • Layer books in warm colors on the coffee table.
  • Stack a few board games beside a chair to invite long fall evenings.

Find more inspiration for refreshing rooms on a budget in this guide: How to Decorate without Spending Money.

Style Everyday Items for Autumn Charm

Common objects take on new meaning in fall’s golden light. A bowl of apples or pears becomes a centerpiece on the kitchen table. Mix in a couple of small pumpkins or pile pinecones in a pretty bowl. Jars, pitchers, and glass canisters you already use can turn into vessels for dried wheat or acorns.

Looking for quick ways to style what you have?

  • Arrange fruit in mismatched bowls for a rustic vibe.
  • Stack plates in autumn shades to layer place settings.
  • Drape scarves as table runners or tie ribbons around everyday vases.

Even lined-up mugs, ready for cider, set out on a shelf can add a touch of seasonal anticipation.

Give New Purpose to Vintage and Thrifted Pieces

Old things hold a special kind of magic. A metal tray, a ceramic pitcher, or vintage books bring story and grace to every corner. Repurpose vintage finds as seasonal accents—a pitcher becomes a vase for leaf branches, or an old ladder leans against the wall as a throw blanket rack. These pieces, with a little love, steal the show in any room.

Ready for more ideas? Explore these upcycled seasonal decor projects that bring thrift store treasures back to life.

Add Seasonal Flair with Simple Touches

You don’t have to stick to the same look each year. Refresh with little tweaks that cost next to nothing. A spool of plaid ribbon dresses up candle holders or planters. Fill a dough bowl with popcorn kernels or dried beans for natural texture. Swap in fall-toned filler for lanterns or clear vases.

Here are simple swaps and accents that work all season:

Everyday ItemEasy Fall UpdateThrow pillowsAdd ribbon or wrap with fabricGlass vasesFill with acorns or small gourdsPicture framesSwap in autumn leaves or quotesServing traysTop with candles and pinecones

If you want more ways to use what’s already in your stash, check out these creative tips on using your seasonal decor in new ways.

A joyful family crafting Halloween decorations together with pumpkins indoors.
Photo by Daisy Anderson

Refreshing for fall is less about buying and more about seeing every piece with new eyes. With a little thought and playfulness, your home can feel ready for the new season—warm, inviting, and uniquely yours.

Conclusion

A clean house, combined with thoughtful fall cleaning and cozy fall decor, makes the season feel even more special. With each cleared shelf and each gentle layer of color or texture, your space welcomes quiet mornings and long evenings in good company.

You don’t have to buy more or chase trends to create comfort. Often, it’s the small changes that spark the biggest sense of warmth—washed throws, glowing candles, or a handful of leaves picked up on a walk.

Enjoy the slow pace this season encourages. Invite friends for cider or gather family for a cozy movie night. You’ve set the stage for real moments and memories.

Thank you for reading and bringing your own care to the season. If these ideas inspired you or brought a fresh sense of calm to your home, share your favorite fall tip below. Here’s to all the beauty and rest that an inviting fall home can bring.

DIY Leaf Garlands With Pressed Leaves and Natural Twine [Step-by-Step Guide]


Golden leaves crunch underfoot as the air grows crisp, painting every sidewalk and backyard in a wash of amber and scarlet. Instead of letting these small wonders blow away, you can give them a new life at home. Using pressed leaves and natural twine, DIY leaf garlands bring the outside in, filling your space with the quiet magic of the season.

There’s an easy grace in working with nature’s castoffs. Each leaf becomes a reminder that beauty can be simple, rustic and right at hand. This project isn’t just about making something pretty, it’s about leaning into a calming, hands-on rhythm that feels as cozy as a favorite sweater. Gather your twine and fallen leaves, and let’s create a touch of autumn that lasts long after the last leaf drifts down.

Gathering and Preparing Fallen Leaves

Every DIY leaf garland starts with a slow, peaceful walk outside. Picture yourself pausing under maples and oaks, hands reaching out to gather autumn’s finest. That first step sets the mood for everything that follows—quiet, thoughtful, and gentle.

Selecting the Perfect Leaves for Your Garland

Fallen maple leaves on the ground in Tartu during autumn, highlighting the season's warm colors. 

Photo by Eva Bronzini

The best DIY leaf garlands begin with a curated mix of natural beauty. Look for leaves with:

  • Vibrant color: Reds, golds, oranges, and deep browns keep your garland bright. Avoid leaves that look faded or spotted.
  • Pliability and freshness: Freshly fallen leaves are less likely to crack. Bend them gently—if they snap, skip them.
  • Intact stems: A sturdy stem helps when threading the twine.
  • Clean, whole surfaces: Avoid leaves with holes, major blemishes, or tears.

Variety keeps things lively. Reach for an assortment of shapes—maples, oaks, birch, and a few surprises here and there—so your finished garland has movement and playful interest.

Before bringing the leaves inside, give them a quick shake outside to dislodge bugs or excess dirt. At home, rinse them lightly in cool water and pat dry with a soft towel to keep pigments from running. If the ground is wet, wear garden gloves and put the leaves into a shallow basket or large paper bag to help air circulate. Damp leaves can mold quickly if packed too tight, so keep your gatherings loose until they dry off.

For more details about gathering the right leaves and preparing them for crafts, check out this helpful resource: How to Press and Preserve Fall Leaves.

Pressing Leaves for Preservation

Preserving the color and shape of your gathered leaves is essential for a garland that stays lovely all season. The simplest way is also the most classic: pressing with heavy books.

  • Layer your leaves: Place each clean, dry leaf between two sheets of parchment or wax paper. This protects book pages and keeps leaves from sticking.
  • Stack with weight: Slip this “leaf sandwich” between the pages of a large, heavy book. Add more weight on top (think extra books or magazines) for an even press.
  • Wait patiently: Leave them to press for at least 7 days for flat, crisp results. If leaves are thick or extra juicy, 10 to 14 days works best.

To guard against mold or browning:

  • Use only fully dry leaves.
  • Change the parchment or wax paper every two days if you notice any moisture.
  • Keep books in a cool, dry room out of direct sunlight.

Some crafters experiment with microwaving or ironing their leaves, yet the old-fashioned book method yields the most natural look for DIY leaf garlands.

Curious about more leaf preservation tactics, like using glycerin or wax for even greater flexibility? See this step-by-step guide: How To Preserve Leaves (6 Methods) for best results.

For visual tips on the pressing process and ways to display your finished leaves, visit: Press play: How to preserve leaves and plants.

Preserving Leaves for Lasting Beauty

When you're making DIY leaf garlands that keep their charm long after the first frost, leaf preservation matters. Fresh leaves fade, curl, and crack, but simple home methods can lock in their color, shape, and flexibility. Whether you prefer a natural sheen or a crisp pressed finish, there's an option that fits every style and space.

Wax-Dipped Leaves: Rich Color and Durability

Top-view flatlay of dried autumn leaves in an old book, creating a rustic feel. 

Photo by cottonbro studio

Waxing leaves is the go-to for a long-lasting, flexible, and vibrant look. The process adds a subtle shine, much like honey on toast, while protecting each leaf from drying or crumbling.

How to safely dip leaves in beeswax:

  1. Gather Supplies: You'll need beeswax pellets, a heat-safe bowl, a saucepan, tongs, and parchment paper.
  2. Melt the Beeswax: Fill a saucepan with a few inches of water. Put your bowl of beeswax pellets inside, making a double boiler. Warm gently over low heat until fully melted. Do not leave unattended.
  3. Prep the Leaves: Make sure leaves are clean and dry.
  4. Dip Each Leaf: Hold a leaf by its stem with tongs or clean hands. Dip into the warm beeswax, covering both sides. Let extra wax drip back into the bowl.
  5. Let it Set: Place dipped leaves on parchment paper. Dry for a few minutes until wax hardens and cools.

Why waxing works:

  • Color stays rich: Beeswax locks in the hues and patterns.
  • Leaves bend, not break: They stay flexible, perfect for garlands that twist or hang.
  • Adds a touch of shine: Glossy leaves look fresh picked.

Safety notes for homes with children or pets:

  • Never leave melting wax unattended— use the lowest heat possible.
  • Keep wax and tools away from little hands and furry helpers.
  • Clean spills right away, as wax can be slippery.

For a deeper look at various leaf preservation options, check out How To Preserve Leaves (6 Methods) for best results.

Alternative Sealing Methods

If melting wax feels too hands-on (or a bit too messy), there are other ways to keep your leaves beautiful for DIY leaf garlands.

Mod Podge:
This all-in-one glue and sealer gives leaves a sturdy, almost laminated finish. Use a small brush to coat both sides of each pressed, dry leaf. Allow to dry between coats for best results.

  • Pros: Simple, no heat needed. Leaves keep their color and resist cracking.
  • Cons: Finish is matte or glossy, but can feel plasticky. Some adhesives may yellow over years.

Iron-On Wax Paper Seal:
Place a leaf between two sheets of wax paper. Cover with another layer of parchment or kraft paper. Set an iron to medium (no steam) and press gently for 5 seconds at a time, moving the iron in circles. Wax paper will fuse and seal the leaf inside, making it last longer.

  • Pros: Low-cost, fast, and safe for kids with supervision. Creates a see-through, natural effect.
  • Cons: Leaves must stay between sheets, so they can’t be touched directly. Not as flexible as wax-dipped.

Comparison Table:

Method Durability Flexibility Shine/Finish Safety
Beeswax Dip High High Glossy, natural Hot wax use
Mod Podge Medium Medium Matte/Glossy Kid-safe
Wax Paper Iron Medium Low Semi-gloss Kid-safe

Check out more options and project inspiration at How to Press and Preserve Fall Leaves.

No matter which technique you choose, preserved leaves help your homemade garlands look gorgeous week after week. Each method adds distinct character—let your style (and patience) guide the way.

Assembling Your DIY Leaf Garlands With Natural Twine

Gathering preserved leaves is only half the thrill—assembling your DIY leaf garlands with natural twine brings them to life. The way you tie, thread, and arrange each piece shapes the warmth your garland brings to a room. Simple tools, a bit of patience, and your own sense of style are all you need to turn your pressed leaves into a homemade work of art.

Styling Tips for Cozy, Natural Decor

Fresh-pressed leaves and natural twine are a match made for fall. Lay out your leaves first to get a sense of how the colors and shapes play together. Use a mix of sizes—large maple leaves draw the eye, while delicate birch or oak add quiet detail.

  • Layer for fullness: Overlap leaves so their edges touch or tuck beneath the next one. This gives your garland natural volume and prevents it from looking sparse.
  • Mix shapes and colors: Alternate bold reds and golds with muted browns or even green. Varying sizes and colors mimic the look of branches in nature.
  • Add small extras: Want even more texture? Thread on pinecones, acorns, or small wooden beads between the leaves. If you love a boho twist, add a few sprigs of dried wheat or lavender.
  • Choose your arrangement:
    • For a dense garland, use leaves back-to-back with only a finger’s space in between.
    • For a looser look, leave about 2-4 inches between clusters. Tuck tiny accent pieces (like acorns or felted balls) in those gaps.

You can attach leaves in several ways:

  • Tying: Wrap the twine around the leaf stems and tie with a simple knot.
  • Threading: Using a large, blunt needle, pierce a small hole in the end of each stem and slip the twine through. This method works best for sturdy leaves like magnolia or oak.
    Step-by-step visuals for this style are at Easy DIY Leaf Garland | Leaf Crafts for Kids and Toddlers.
  • Clip-ons: For pressed, delicate leaves, try tiny wooden clothespins or paperclips. These grip without tearing and let you easily adjust your design.

Once assembled, garlands shine when draped in cozy spots:

  • Hang them above the mantel, letting the leaves fall in gentle waves.
  • String them across windowpanes, where sunlight catches every color.
  • Run them along the center of a farmhouse table, maybe with pillar candles nestled in between.

Try grouping a few garlands together at different heights for a layered, welcoming backdrop. For extra inspiration, see how natural garlands can transform a room in Real Leaf Garland.


Eco-Friendly Finishing Touches

Sustainability and style go hand in hand with DIY leaf garlands. Choose natural twine—opt for soft cotton, linen, or jute. These biodegrade easily and add an earthy texture that synthetic string can’t match.

When possible, use other biodegradable extras:

  • Wooden beads: These add warmth and are fully compostable.
  • Small pinecones or acorns: Natural finds that return to the earth without harm.
  • Dried botanicals: Branches or flower heads cut after the season add variety, then break down with ease later.

After the season ends, your garland doesn’t have to go to waste. Twine, wood beads, and most pressed leaves can go straight to your compost pile if they’re not waxed or sealed with plastics. The rest can be tucked away for next autumn or reused in wreaths or smaller crafts.

If you’re curious about the best eco-friendly ways to reuse or compost leaf garlands, community forums like Sustainably foraged (and free!) wedding garlands & greenery offer smart tips for keeping your decor green, season after season.

Building your garland with nature’s own tools means your home looks beautiful and you leave nothing behind but good memories—and maybe a trail of leaf bits as you decorate.

Making DIY Leaf Garlands a Seasonal Ritual

Paper cutout of leaf shape held against vibrant orange autumn foliage. 

Photo by Marta Wave

There’s something grounding about transforming fallen leaves into DIY leaf garlands year after year. This gentle ritual lets you slow down, reconnect with the natural world, and weave the memories of a season into your home. Each step turns ordinary moments—walking outside, choosing leaves, threading twine—into a tradition that feels rich and comforting. Whether you do this project solo, with friends, or surrounded by children, setting aside time for garland-making is like wrapping the season around you.

Turning Leaf Garland DIY Into a Tradition

Making DIY leaf garlands isn’t a chore—it’s a yearly invitation to savor autumn’s simple pleasures. When you collect leaves, press them, and string them up with twine, you’re honoring the small beauty found in everyday life. Set aside a weekend afternoon or a chilly evening for this practice. Pour a cup of tea, turn on your favorite music, and gather your loved ones—or just yourself.

  • With kids: Children bring wild energy and wonder to the table. Leaf garland-making sharpens their hand-eye coordination and gives them a sense of accomplishment. It also ties them to the rhythms of the seasons, grounding little ones in nature’s cycles. For more on how autumn crafts benefit children, explore The Benefits to Children of Autumn Crafts.
  • With friends or family: Invite neighbors or friends for a cozy afternoon indoors. Swap memories and share stories as you pass around leaves and twine. The finished garlands can become gifts or seasonal keepsakes for each person to take home.
  • As a mindful solo ritual: Doing this solo turns it into an act of self-care. It’s a way to reset, breathe, and notice what’s good and grounding in the world.

No matter how you gather, what matters most is giving yourself permission to play. Perfection doesn’t belong here—a crooked leaf or random color only adds to the charm. Each garland tells the story of a particular fall, each knot holding a little moment of calm.

Building Gratitude and Connection

Turning DIY leaf garlands into a ritual means pausing to notice what’s worth saving. Each year’s colors, weather, and even your own mood are captured in the leaves you choose. As you string each leaf, take a second to reflect on what brought you joy this season or what you’re grateful for. Let this creative habit stitch gratitude into your home, much like a patchwork quilt holds family stories.

  • Personalize the tradition: Try jotting a word or memory on a leaf using a fine pen. Mix these “gratitude leaves” into your garland as reminders of what makes each autumn special.
  • Return to it yearly: Make a new garland every year, tucking old ones away as keepsakes or composting them to start fresh. Over time, this tradition weaves a timeline of autumn’s past—one garland at a time.

For a beautiful example of making a DIY real leaf garland part of seasonal home decor, see DIY Real Maple Leaf Garland | Fall Decorations.

Embracing the Creative Process

DIY leaf garlands invite you to play with shape, color, scent, and texture. There is no wrong way—just your way. Shake off any pressure to make it “Pinterest-perfect.” Loosen up, laugh, and lean into the process. Some years your garland will look full and bright, others soft and subtle. Each one will reflect the season you’re in, both outside and inside.

  • Encourage mistakes: Let leaves overlap, twist, or dangle. Play with clusters or space them out. Your garland will be uniquely yours.
  • Repeat and refine: The simple act of gathering, pressing, and twining leaves is soothing in its repetition. Return to it next year, and the year after. Let it change as your life changes. If you want more ideas for creative approaches, check out DIY Fall Garland With Waxed Leaves.

Making DIY leaf garlands moves you from season to season with intention. It gives your hands something to do and your mind a gentle break. This year, invite the tradition in—and see what memories you string together.

Conclusion

Turning autumn leaves into DIY leaf garlands invites warmth and gratitude into your home. With pressed leaves and natural twine, ordinary walks become stories you can hang in the window or across the mantel. Every garland captures the moment—a certain day, a certain shade, laughter or calm.

This simple project stays fresh every year, whether you swap in new leaves, add foraged extras, or share the tradition with friends and family. Let your garland be a lasting touch of the season that welcomes you home. Try fresh ideas, show off your creations, and share the small joys this ritual brings.

Thank you for spending time here. If these garlands brought a little peace or inspired a new tradition, share your moments or finished pieces with others. The beauty of DIY leaf garlands is that each one is as unique and lasting as the autumns you remember.

DIY Christmas Ornaments for Kids: Toilet Paper Roll Craft Ideas for Moms


I know it is early, but it never hurts to start planning for some Christmas crafts to do with your children or grandchildren.  Here are some cute ideas.

Small hands gripping scissors, eyes wide with excitement, glue smudges on their cheeks—these are the memories I love to make around the holidays. There's something special about turning ordinary supplies into keepsakes. Toilet paper rolls, often tossed out without a thought, take on new life as cheerful Christmas ornaments. They’re easy for kids to handle, gentle on your budget, and a gentle nod to being kind to the planet.

With these quick projects, kids feel proud seeing their creations sparkle on the tree. Moms can relax knowing the mess is minimal and the materials are safe. Every step is filled with laughter and a sense of accomplishment. Let’s turn the simple into something magical and fill your home with joy that starts at the kitchen table.

See these ornament ideas come to life on YouTube.

Why Toilet Paper Rolls Shine for Christmas Ornament Fun

Toilet paper rolls truly shine as the unsung heroes of Christmas ornament fun. These humble tubes bring color, cheer, and endless imagination to your kitchen table, all without breaking your budget. When holiday magic is found in the everyday, even the simplest materials can transform into treasures—especially when little hands are part of the process.

Toilet paper roll on reflective surface with a colorful starry backdrop. 

Photo by Magda Ehlers

Eco-Friendly Benefits for Modern Families

Toilet paper rolls make ornaments that don’t just dazzle, they also help the planet. By rerouting these tubes from the trash to the tree, I give my kids a hands-on lesson in kindness for Earth. Using recycled materials cuts down on waste, which means every ornament is a step toward cleaner holidays for everyone. According to the guide on eco-friendly fun with recyclables, simple acts like these help conserve resources and minimize our impact on the environment—one ornament at a time.

We teach our kids that wonder can begin with what’s already in our home, not just what’s bought from a store. Each ornament becomes a small symbol of sustainable holiday cheer.

Budget-Friendly Holiday Joy

Homemade Christmas ornaments shouldn’t empty your wallet. Toilet paper rolls are free and always on hand. No need for expensive supplies when cardboard tubes are perfect for snowmen, reindeer, or glittery stars. The beauty of this? You reduce costs but not the fun.

If you want more proof that making Christmas memories doesn’t need a big budget, check out these cheap Christmas crafts for kids. Even simple items can be turned into sparkling keepsakes with a little tape and a lot of imagination.

Here’s why moms (and kids) love using toilet paper rolls:

  • No extra cost—they’re already in every home.
  • No trips to the craft store on busy holiday weekends.
  • No guilt over pricey ornaments that might get broken.

Creativity Unleashed with Every Tube

With toilet paper rolls, there’s no wrong way to start. The blank cardboard becomes snowmen with felt scarves, silly elves with painted hats, or glitter-covered shooting stars. Kids can cut, color, paint, or sticker them any way they dream. If the result looks a little crooked or lopsided? That just adds to the charm.

To help kids put their creative stamp on Christmas, I like to keep these supplies on hand:

  • Crayons or washable markers
  • Non-toxic paint
  • Scraps of ribbon, fabric, or felt
  • Yarn, stickers, and plenty of glue

This open-ended freedom sparks ideas and builds confidence. Every roll gives kids a canvas, and every finished decoration is a point of pride. For parents worried about recycled materials, rest easy—these projects bring smiles, not stress. According to this resource on creative projects using recycled materials, using old items for new memories helps your family form traditions that matter.

Toilet paper rolls aren’t just recycled—they’re revived, reimagined, and ready for tree-trimming joy.

Quick Tips: Getting Ready for Ornament-Making With Kids

Spread out the newspaper, roll up your sleeves, and get ready for giggles! Prepping for a Christmas ornament session with kids sets the mood for fun and keeps things stress-free. A little planning helps everyone—toddlers, grade-schoolers, or big kids—take part safely and with big smiles.

A child painting an Easter egg with a brush, focused on creative arts and crafts indoors. 

Photo by Tima Miroshnichenko

Gathering Supplies Before You Call the Kids Over

Before inviting tiny helpers to the table, gather everything you’ll need. This keeps little hands from wandering through drawers or scurrying off mid-project.

  • Toilet paper rolls (clean and dry)
  • Washable markers or crayons
  • Non-toxic paints
  • Safety scissors (rounded tips for toddlers)
  • White glue or glue sticks
  • Yarn, ribbons, or string
  • Googly eyes, buttons, pom-poms
  • Newspapers or old sheets for the table

Having materials ready keeps the excitement high and the waiting to a minimum. If you want more helpful hints on choosing age-friendly supplies and prepping, these arts and crafts tips for families will help you start out strong.

Prepping the Toilet Paper Rolls

Give each roll a quick check. Make sure they’re sturdy and free of leftover tissue. For younger kids, cut the tubes ahead into smaller rings or shapes, so their focus can stay on the fun of decorating.

  • Flatten rolls gently to make painting easier.
  • Use adult scissors for tricky cuts or notches.
  • Consider pre-cutting string holes if you’ll be hanging the finished ornaments.

If your child is older and ready for careful scissor use, let them cut their own shapes (with supervision). For toddlers, it’s safest for parents to handle all cutting tasks in advance.

Taming the Mess Before It Starts

Let’s be real: glue, paint, and paper bits love to travel. Keep the chaos in check by setting up a dedicated workspace.

  • Cover the table with newspaper, a washable mat, or an old bedsheet.
  • Keep damp cloths or baby wipes nearby for quick cleanups.
  • Use shallow bins or trays to corral supplies.

Expect a little mess—it means the fun is real! If you’d like more tips on simple mess management, you’ll find plenty of creative ideas in this guide on mess-free crafts for kids.

Safety First for Every Age

Safety makes everyone happier, especially curious toddlers. Some quick pointers:

  • Always supervise kids, even older ones.
  • Skip small decorations with little ones under three to avoid choking hazards.
  • Use non-toxic, washable materials and safe, rounded scissors.
  • Store sharp or strong adhesives out of reach.

You can find more details about age-appropriate choices and best practices for safe DIY time in this post on art and craft safety for children.

Inviting Kids to Create Together

Set the project’s pace so everyone has time to enjoy each step. Give each child plenty of space and their own set of supplies to minimize arguments. Let mistakes become part of the design—quirks are what make these ornaments keepsakes you'll treasure for years.

A well-set table turns a simple afternoon into an easy, memorable family tradition.

Star and Snowflake Ornaments: Classic Shapes Made Simple

Homemade ornaments fill the tree with memories, and there’s no shape more beloved at Christmas than the star or the sparkling snowflake. These shapes help little hands practice cutting and folding, while leaving plenty of room to decorate big. You don’t need fancy tools—just a pile of toilet paper rolls, some creative supplies, and a little patience as glue dries and colors mix. Let’s turn simple tubes into joyful snowflakes and stars that shine and shimmer from your tree.

How to Make Easy Toilet Paper Roll Snowflakes: Walk through simple snowflake shapes for small hands. Suggest ways to decorate with paint, glitter, or sequins.

Closeup of stacked brown cardboard tubes of finished toilet paper placed on wooden table 

Photo by Jessica Lewis 🦋 thepaintedsquare

Snowflakes are a favorite for toddlers and younger kids. Each one turns out unique and can be as simple or detailed as you want. Here’s my favorite process for making snowflakes from toilet paper rolls:

  1. Flatten the tube and cut it into rings, about half an inch wide.
  2. For a classic snowflake, use 6 rings. Pinch them into points so each section looks like a flower petal or teardrop.
  3. Arrange the rings in a round shape, then glue where each side touches—hold for a few seconds so it sticks well.
  4. Layer extra rings or smaller pieces for more “branches” if kids want a fancier snowflake.

Painting snowflakes white or silver before glueing makes them shiny and bright. Once they dry, decorating is the real fun:

  • Squeeze school glue along the edges and sprinkle with glitter for a frosted look.
  • Dab on sequins or tiny pom-poms as if they’re snow crystals.
  • Paint with blues, purples, or gold for a pop of color.

Kids can also add popsicle sticks for extra structure or fun shapes, as shown in some tutorials like these toilet paper roll snowflake ornaments. Glitter or ribbon makes them shimmer under holiday lights. Finish each snowflake by threading a loop of yarn or ribbon through one of the holes—now it’s ready to hang.

Folded Star Ornaments for Sparkle and Shine: Show the process of creating and assembling the star shape. Suggest finishing touches: colorful ties, raffia, buttons, or bells.

When making stars, I love folding and layering toilet paper roll pieces to create a dimensional effect. Kids love to see flat cardboard transform into something that pops out from the tree. Here’s a simple step-by-step for making classic five-point stars:

  1. Start with a clean tube and flatten it. Cut the tube into rings, then cut each ring open so you get five strips.
  2. Fold each strip in half (so the bend is crisp), then pinch the ends to make the star’s arms.
  3. Lay out the five folded strips in a star shape, with the pointed ends meeting in the center.
  4. Use a glue gun (adults should help!) or tacky glue to secure where the arms overlap.

Once the star dries, let the fun part begin:

  • Paint the star bright yellow, metallic silver, or in a rainbow of shades.
  • Add sparkle with glue and chunky glitter on the tips.
  • Tie on raffia, colorful baker’s twine, or yarn for hanging.
  • Hot glue on a button, bead, or jingle bell right in the middle.

For more inspiration, the idea of combining different materials, like folded fabric stars, can spark new ways to use ribbon, felt, or even scraps from old clothes. Every star ornament becomes a memory, sparkling with personality and a sense of pride each time you look at your Christmas tree.

Animal and Character Ornaments: Reindeer, Angels, and More

Turning a humble toilet paper roll into a character that brings smiles is like sprinkling a little extra holiday joy around the house. Animal shapes and classic Christmas figures let your kids give each ornament a face, a silly style, or just a dash of sparkle that’s all their own. Whether you’re aiming for reindeer with wobbly antlers, angels with shiny wings, or Santas with big white beards, these ideas use simple supplies and a lot of imagination.

DIY Reindeer Ornaments With Personality

People crafting Christmas decorations with ornaments and candles indoors. 

Photo by cottonbro studio

Bringing Rudolph and his friends to the tree is easier than you might think. Start with a painted toilet paper roll—brown is classic, but your child might want rainbow reindeer or even a blue one. Once dry, set out the extras:

  • Glue on googly eyes or draw big friendly eyes with a marker.
  • Stick a red pom-pom or bead for the nose—Rudolph needs his signature shine!
  • Cut short twigs or twist brown pipe cleaners for antlers and glue them to the top or sides.
  • Add a smile or a silly tongue for extra expression.

Get creative with poses! Use pipe cleaners as legs to make your reindeer stand. Lay your roll flat and glue felt hooves underneath if you’d rather hang it on the tree. For even more character, let kids glue on a bow tie or scarf from tiny scrap fabric.

Kids can find adorable inspiration and templates for reindeer ornaments in this guide to toilet paper roll reindeer crafts. Mixing and matching supplies turns every reindeer into a unique member of your own North Pole herd.

Making Toilet Paper Roll Angels and Santas

Toilet paper rolls become magical when you turn them into angels or Santas. For angels, paint the roll white, cream, or pale yellow. Once the base is dry, show kids how to use simple materials for the details:

  • Cut big wings out of white or gold paper and glue on the back.
  • Draw a sweet face with a rosy nose and cheeks.
  • Wrap shiny tinsel or metallic pipe cleaner for a halo.
  • Dress the angel in a skirt made from doilies, tissue, or even cupcake liners.

Santas are just as easy and fun. Paint the roll in red for his suit, leave a strip plain for the face, and add a black belt with a buckle using marker or a paper strip. Ideas to finish Santa:

  • Glue on a cotton ball or white yarn for the beard.
  • Make a cone-shaped hat from red paper and glue on a bit of cotton at the tip.
  • Draw or glue eyes, and add pink for chubby cheeks.
  • Use a scrap of felt for Santa’s mittens or boots.

Explore more ideas with this handy tutorial for a paper roll angel that breaks down each step for a keepsake you'll love to hang. With every character you make, kids can tell a Christmas story through their ornaments—each roll becomes a tiny friend to celebrate the season.

Let your kids dream up extras, like elves with pointy hats and ears or even a snowman family with scarves and top hats. The simpler you keep the supplies, the bigger their imagination can grow.

Creative Touches: Turning Ornaments Into Keepsakes

A simple cardboard tube, when decorated by tiny hands, becomes much more than an ornament. It turns into a story, a memory, or even a little treasure. The real beauty of homemade Christmas ornaments is how easy they are to make unique for every child and every year. I always encourage adding personal details, using old craft bits, or even bringing in unexpected materials from around the home. These creative touches transform a fun afternoon into a bundle of keepsakes you’ll love uncovering each December.

Smiling siblings showcasing handmade Christmas ornaments, celebrating the festive spirit. 

Photo by Any Lane

Adding Names, Dates, and Glittery Initials

Kids light up seeing their name, the year, or their initials on an ornament. It gives every decoration a personal touch no store-bought option can match. Try these simple ideas for writing on ornaments:

  • Use permanent markers or metallic paint pens to add names or dates.
  • Cut glittery letters from sticky foam sheets for initials that sparkle.
  • Write a short holiday message, like “Merry Christmas 2024,” along the edge.

Markers in gold, silver, or red really pop against painted cardboard. For more inspiration, browse creative ways to personalize homemade ornaments and see what catches your eye on this board of personalized Christmas ornament ideas.

Handprints, Self-Portraits, and Photos

Little hands grow fast, but a painted handprint or traced shape helps remember just how small they once were. Here are my favorite ways to preserve those moments:

  • Coat a palm in white paint and press onto a painted ornament for a snowman “handprint.”
  • Draw faces, add real yarn hair, or let your child make a mini self-portrait on each roll.
  • Print wallet-sized family photos and glue them to the finished ornament, bordered by glitter or ribbon.

Each year, these keepsakes show a timeline of growing kids and changing styles.

Using Leftover Craft Supplies and Found Materials

Turning leftovers into magic is part of the fun. I never throw out tiny scraps, old buttons, or random bits of ribbon—they all find their way onto a new ornament at some point. Some ways to stretch your supplies:

  • Glue mismatched buttons for eyes, noses, or snowflake centers.
  • Use leftover ribbon or yarn for hanging loops or decorative bows.
  • Mix torn scraps of wrapping paper into festive collages.

According to this guide on upcycled Christmas craft ideas, buttons, fabric remnants, and even tags from gifts can spark new creations. Using what’s at hand teaches kids about reusing and makes every ornament that much more meaningful.

Bringing Nature and Everyday Finds Into the Fun

Sometimes the best materials come from a walk outside or a search through kitchen drawers. Natural objects and forgotten bits can bring an earthy, whimsical feel to any project. Consider these easy touches:

  • Tiny pinecones, acorns, or twigs glued to the top for hats, arms, or antlers.
  • Small pieces of twine as scarves or belts.
  • Shells, sticks, or even painted pasta shapes for extra interest.

Explore more ways to use what’s around your home in this set of eco-friendly recycled Christmas decor ideas.

Celebrate Each Child’s Personality

The best ornaments capture your child’s mood, favorite color, or even a silly joke from the season. Let siblings each choose their own style or assign a “theme” for the year—animals, superheroes, family trip memories, anything goes. Mix and match supplies, snap a photo of each creation, and write down your child’s explanation in a holiday journal. When you decorate the tree together in future years, you’ll each have a bundle of keepsakes that tell stories, not just fill branches.

Conclusion

Every toilet paper roll ornament holds the fingerprints and laughter of your child, a little reminder that joy can bloom from the simplest things. These homemade treasures bring back the feeling of small hands at work, a table sprinkled with glitter, and the sound of shared stories. With each star, snowflake, or reindeer, you’re not just decorating a tree—you’re building a collection of memories, year after year.

Let this be more than a project. Savor the mess, the crooked smiles, and the quiet moments with your kids. Invite everyone to add their own flair and look forward to pulling out these keepsakes every December. Thank you for making time to create with love. If you have a favorite ornament or a new idea, share it—your story might inspire another mom to make magic from a simple cardboard tube.